
35+ Christmas Bow Decor Ideas for a Festive Home
If one detail defines Christmas decorating right now, it is the bow — crowning trees in place of stars, swagging across mantels, tying every napkin at the table — and these 35+ christmas bow decor ideas look expensive but take minutes each, almost all starting from a single bolt of wired velvet ribbon.
Bows on the Tree
1. The Giant Bow Topper: A Bow Where the Star Used to Be
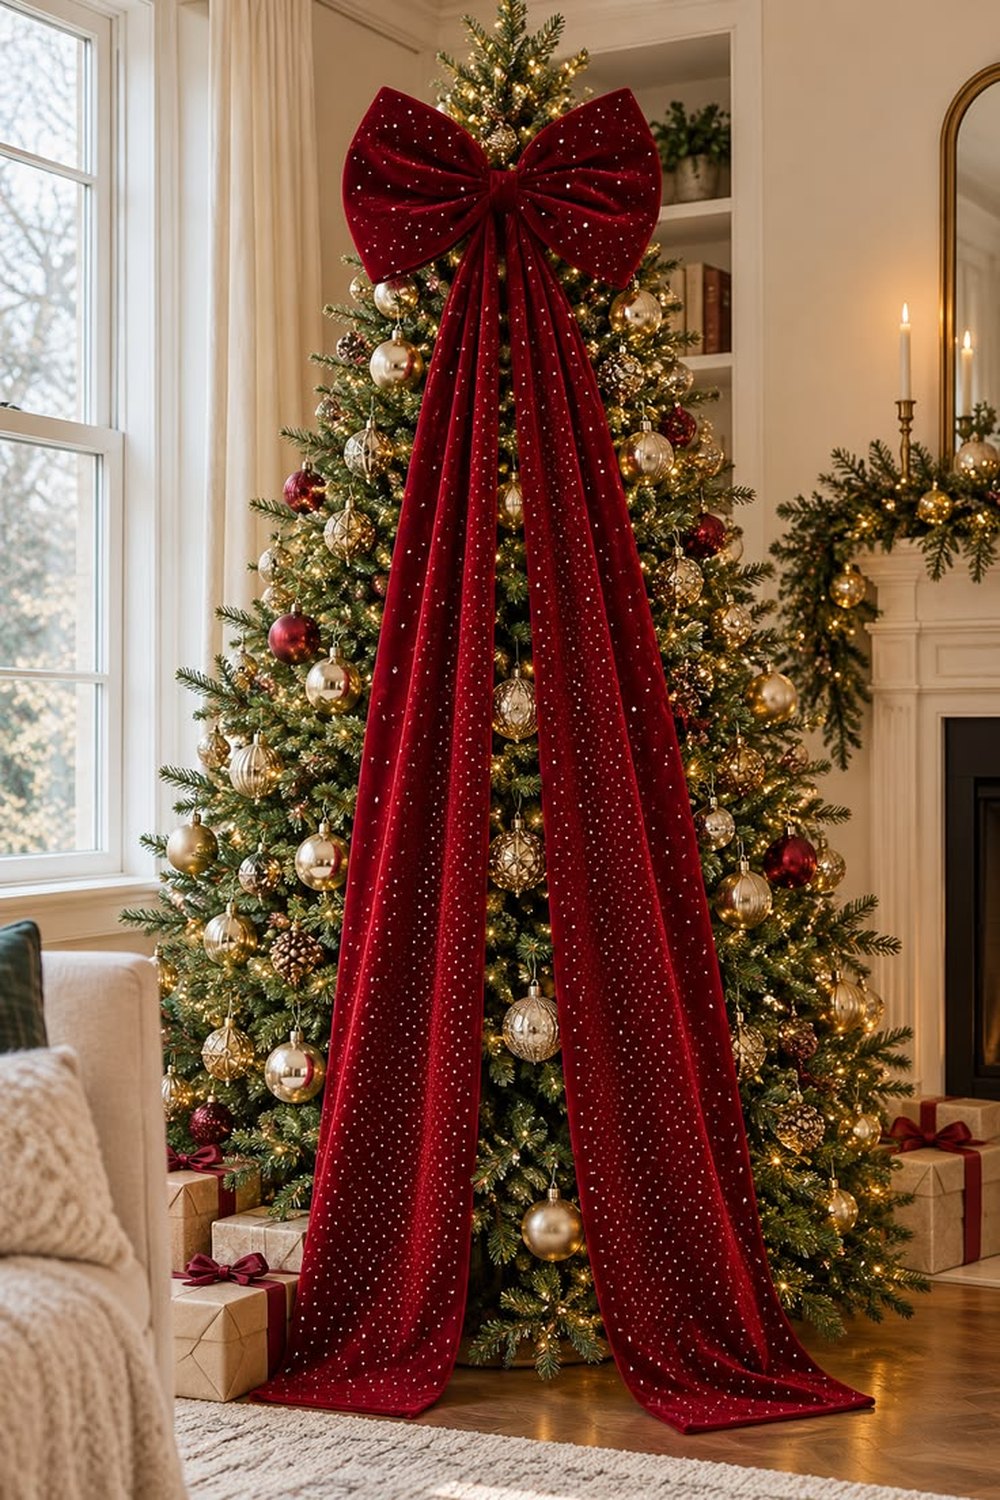
One enormous bow at the crown — the topper everyone is copying this year.
Replace the star or angel with a single oversized velvet bow at the very top of the tree, loops full and round, tails left to fall gracefully down the branches. It reads romantic and modern at once, and it works with any colour story, because the bow simply wears the tree's main colour — bigger. This is the headline christmas bow decor idea of the season, and the easiest tree transformation on this list.
Styling tip: use wide, wired, double-faced velvet ribbon so the loops hold their shape, make the loops a generous 20–25 cm across, and cut the tails at a sharp 45-degree angle. Let the tails hang at least a third of the tree's height, and wire the bow to the top branch so it sits proudly upright rather than nodding forward.
2. Bows as the Main Event: A Tree Dressed in Bows Alone
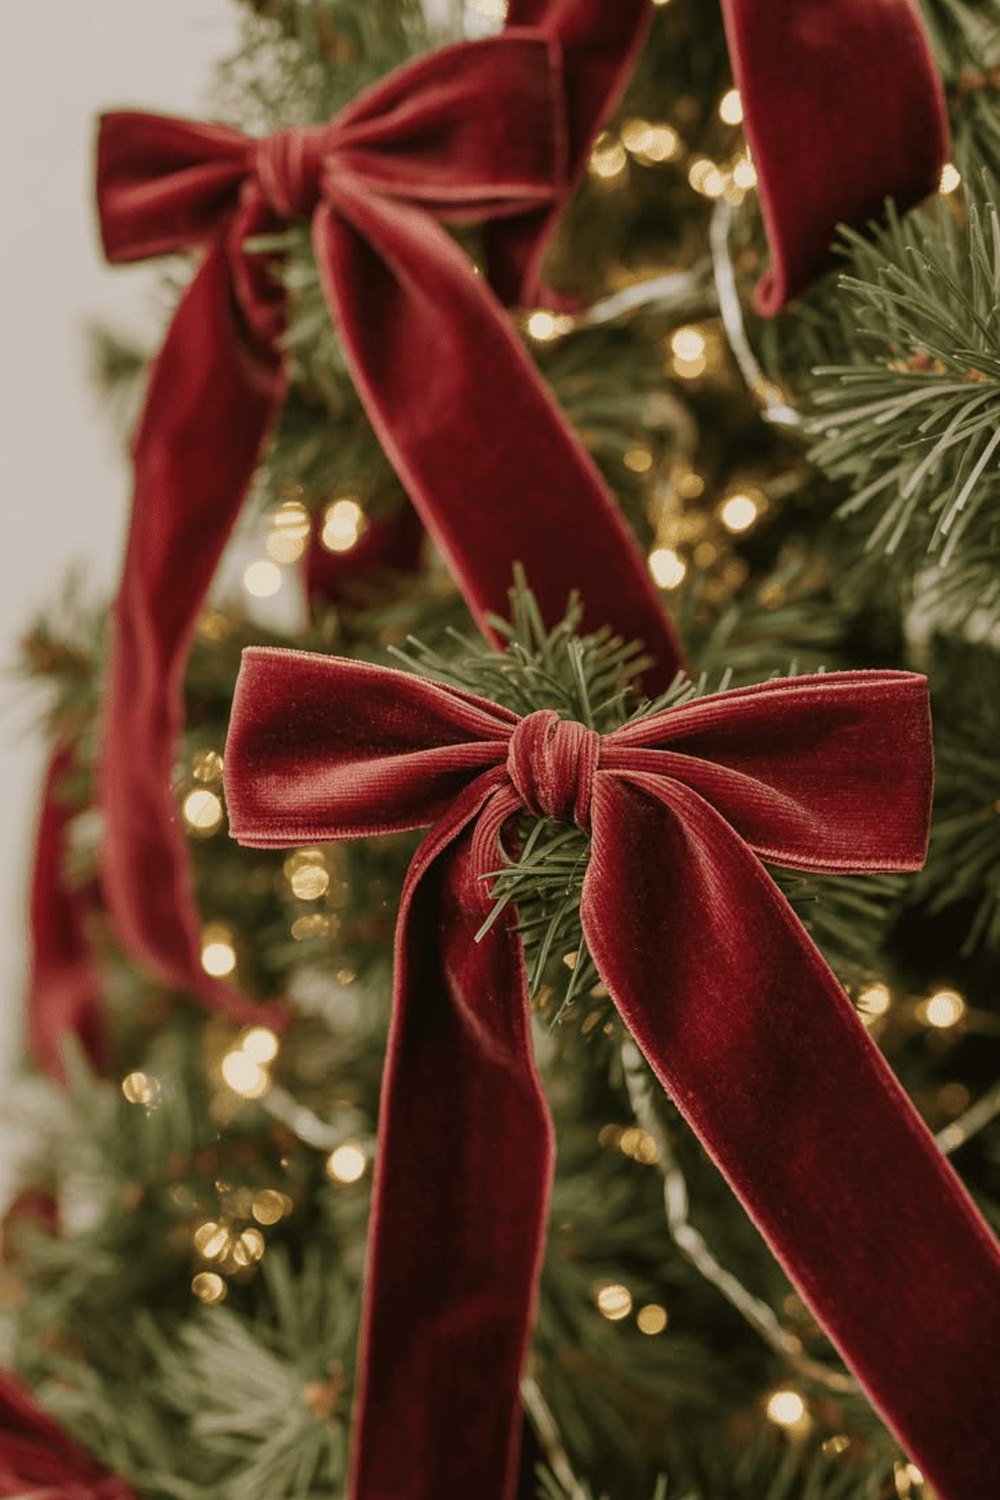
Eight to twelve big bows, warm lights and little else — the tree that needs no baubles.
Bows have moved from accent to main event: eight to twelve large wired velvet bows, spaced evenly from the top of the tree to the bottom, can carry the whole decoration. Add warm white lights and a few plain baubles tucked deep in the branches for depth, and the effect is lush, tailored and very current — especially in burgundy, blush or forest green.
Styling tip: consistency is everything. Tie every bow the same size — loops around 12–15 cm — with the same simple centre twist, and place them in a loose spiral so the eye travels. As a guide, plan on roughly one large bow per foot of tree height.
3. Ribbon Waterfall Cascades Finished with Bows
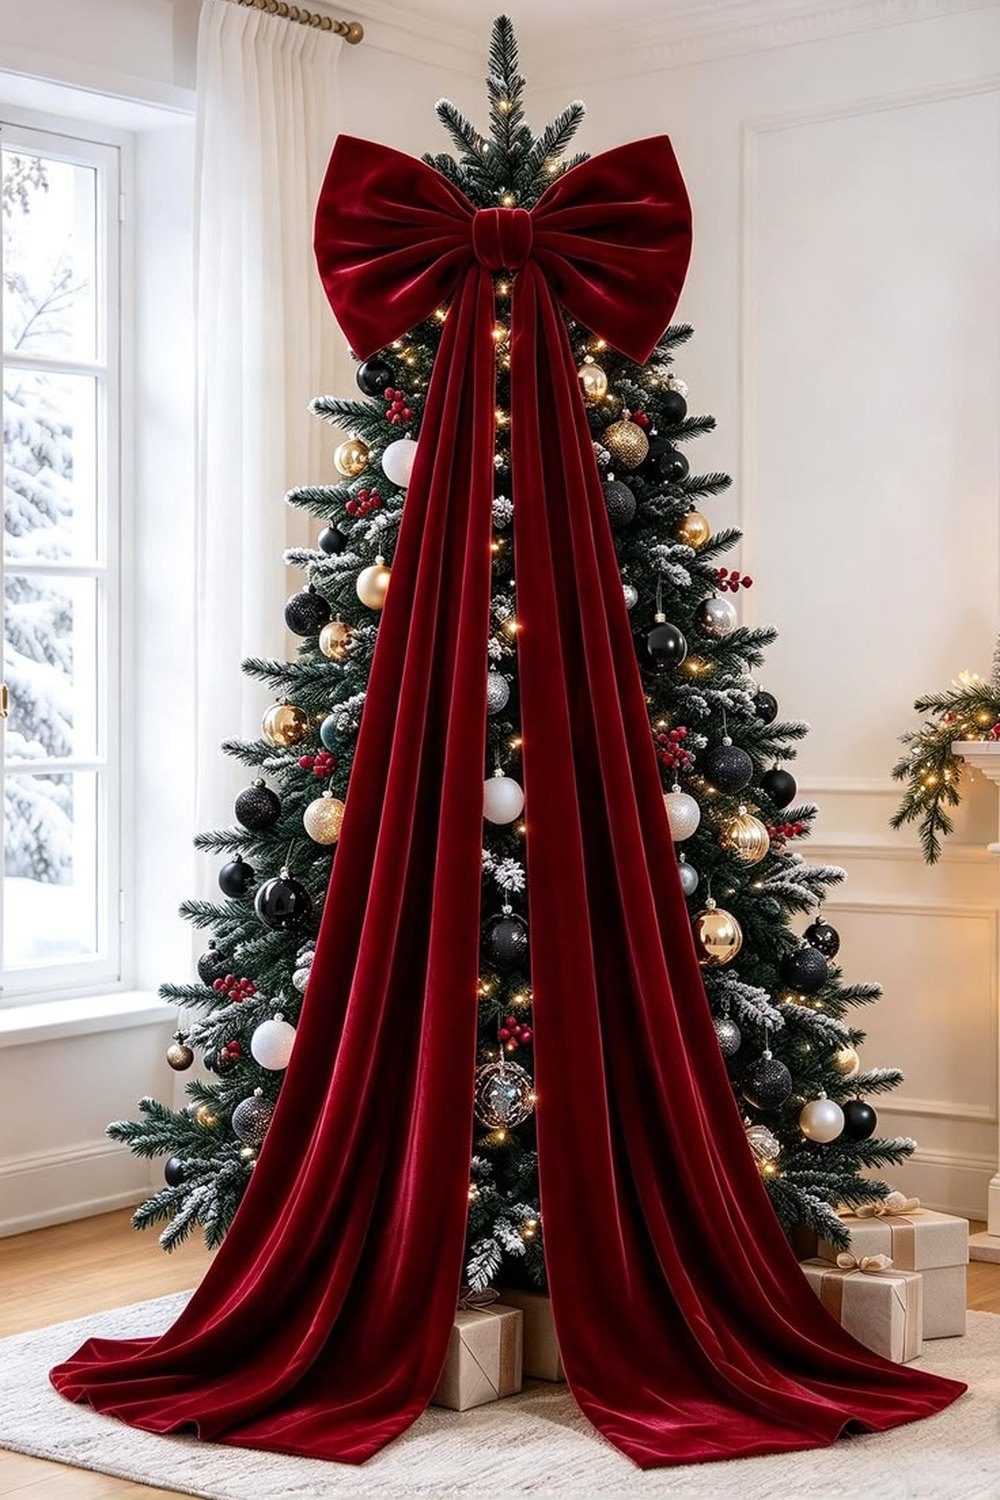
Ribbon poured down the tree in waterfalls, each cascade crowned with a bow.
Instead of spiralling ribbon around the tree, cut wired ribbon into lengths of a metre to a metre and a half and let each piece pour vertically down the branches in a loose waterfall. A small bow tied at the top of each cascade hides the tuck-in point and makes the ribbon look deliberately placed rather than draped. It photographs beautifully and uses far less ribbon than a full spiral.
Styling tip: start each cascade at a slightly different height and let some tails end mid-branch — perfectly even waterfalls look artificial. Wired ribbon holds the soft S-curves; unwired ribbon just hangs straight and sad.
4. Mini Bows in the Gaps: The Finishing Touch
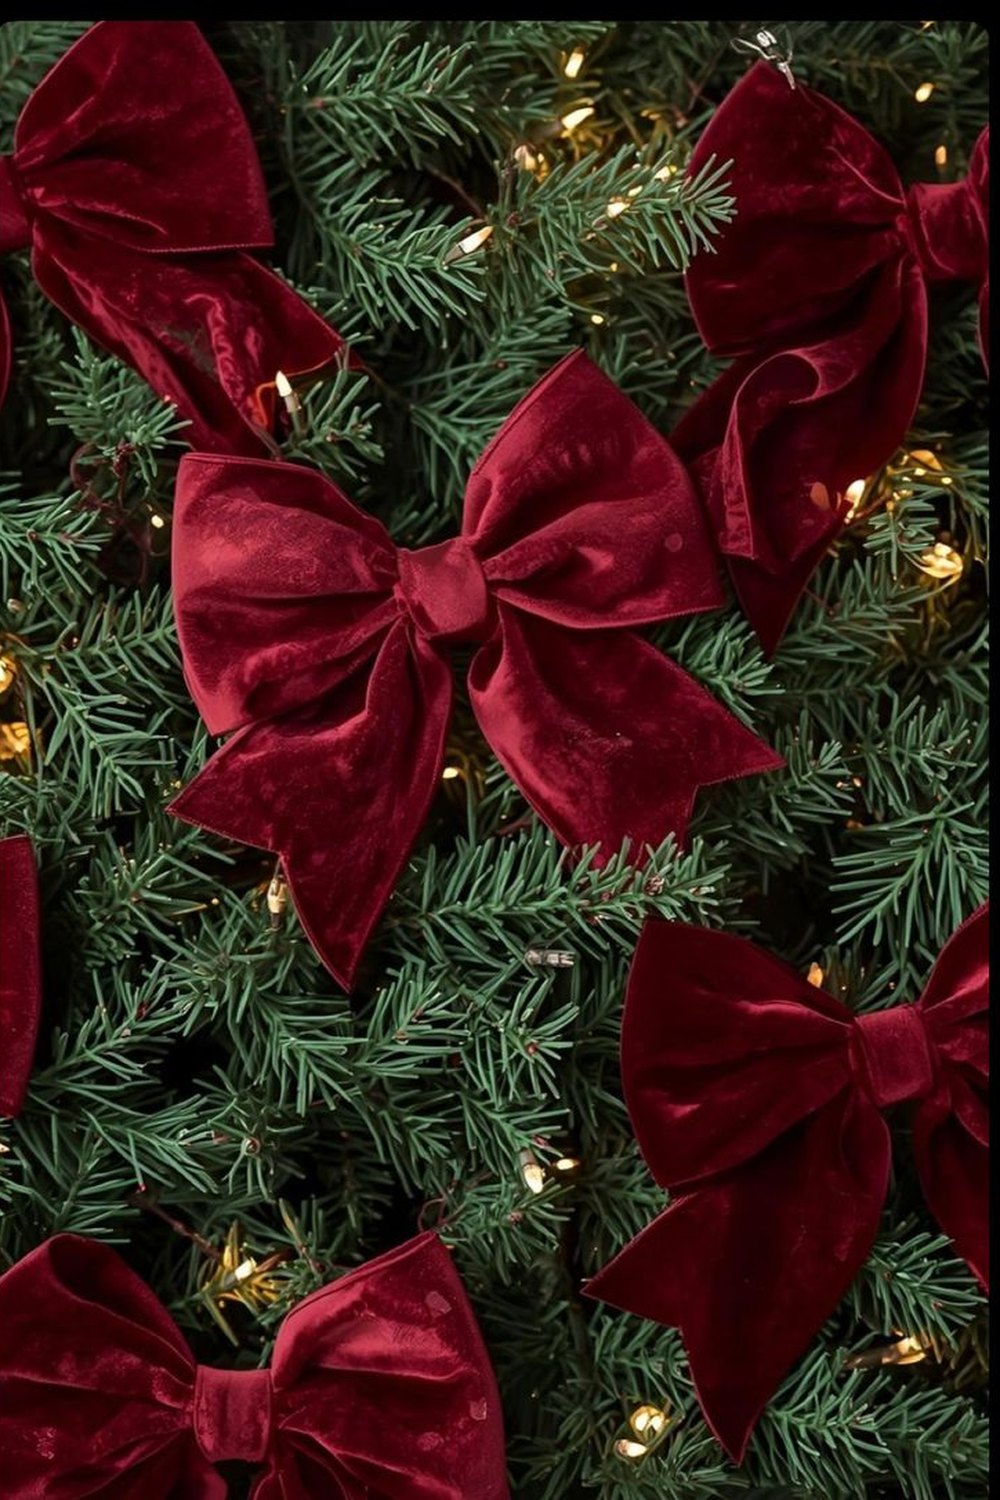
Little bows tucked deep in the branches fill the gaps baubles leave behind.
Every tree has thin patches — the dark hollows deep in the branches where ornaments never quite reach. Small bows made from narrow ribbon, wired deep into those gaps, add colour and texture exactly where the tree needs filling, and they catch the light from the strings woven behind them. It is the cheapest way to make an ordinary tree look fuller.
Styling tip: minis are the perfect use for ribbon offcuts. Make them from 2.5–4 cm ribbon with loops about 5 cm across, attach each with its own twist of wire around a branch, and cluster them near lights so they glow rather than disappear.
5. Tartan Bows: The Classic Heritage Tree
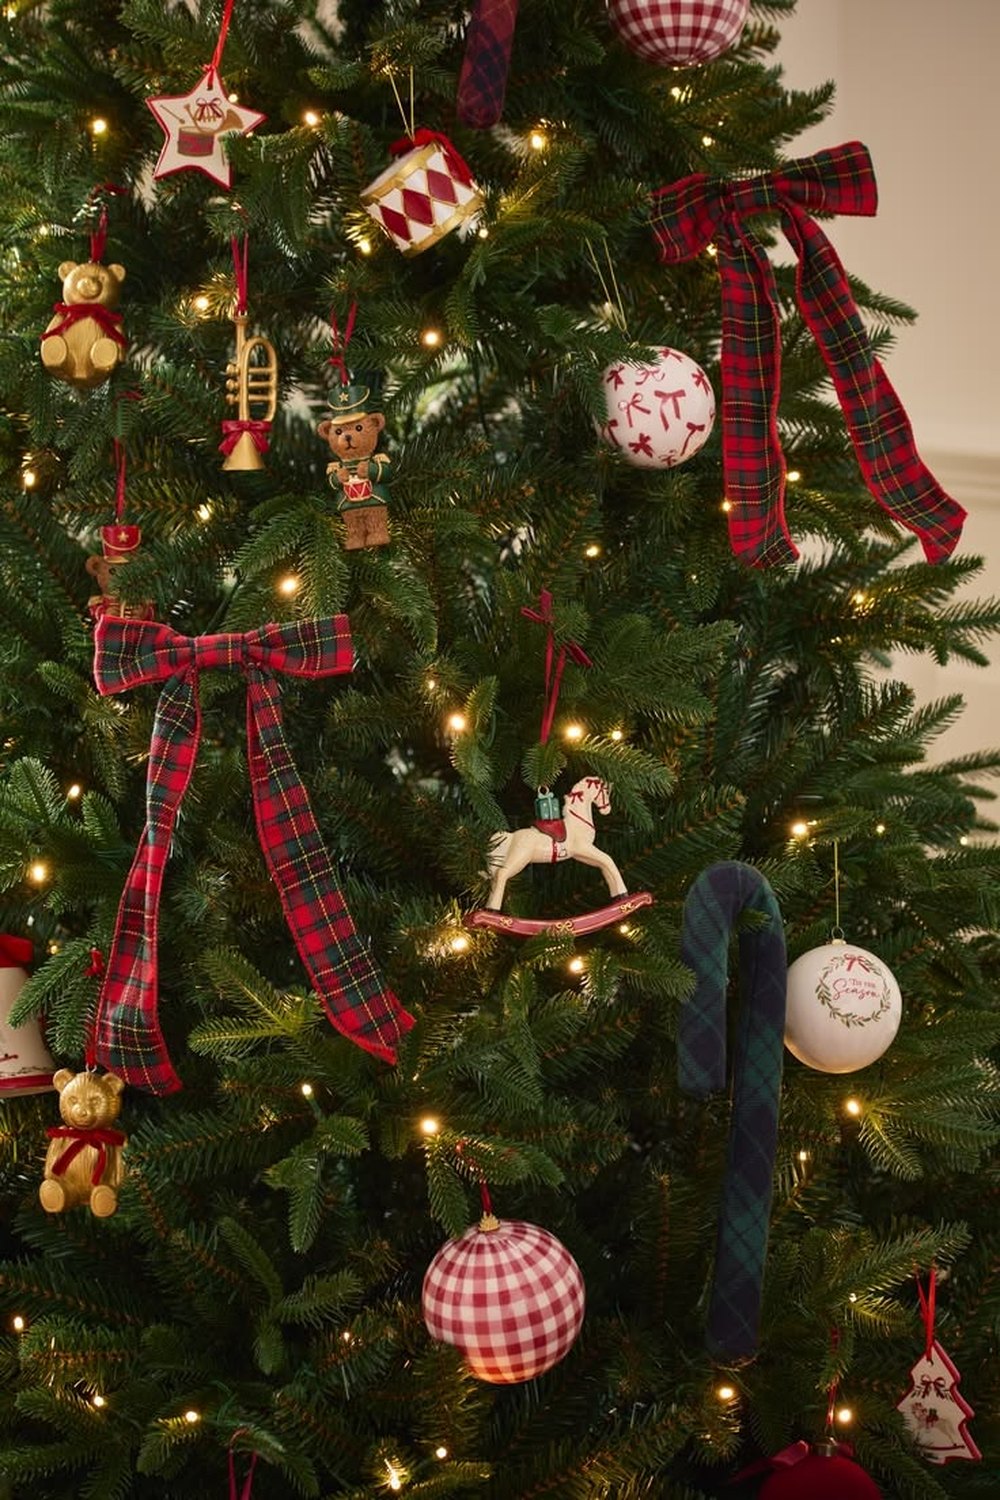
Plaid bows bring instant country-house Christmas to a plain green tree.
For a refined, heritage feel, tie the tree's bows from Black Watch or red tartan ribbon and pair them with hunter green and oxblood ornaments and antique gold accents. The deep, light-absorbing plaid reads expensive against wood, leather and warm lighting, and it is the bow version of the Ralph Lauren Christmas look that is everywhere this year.
Styling tip: let tartan bows hang in relaxed, slightly drooping loops rather than crisp perky ones — the softness is what makes them look heritage rather than novelty. Tuck a small antique-gold bell wherever a bow meets the branch for the full effect.
6. One Colour, Head to Toe: The Monochrome Bow Tree
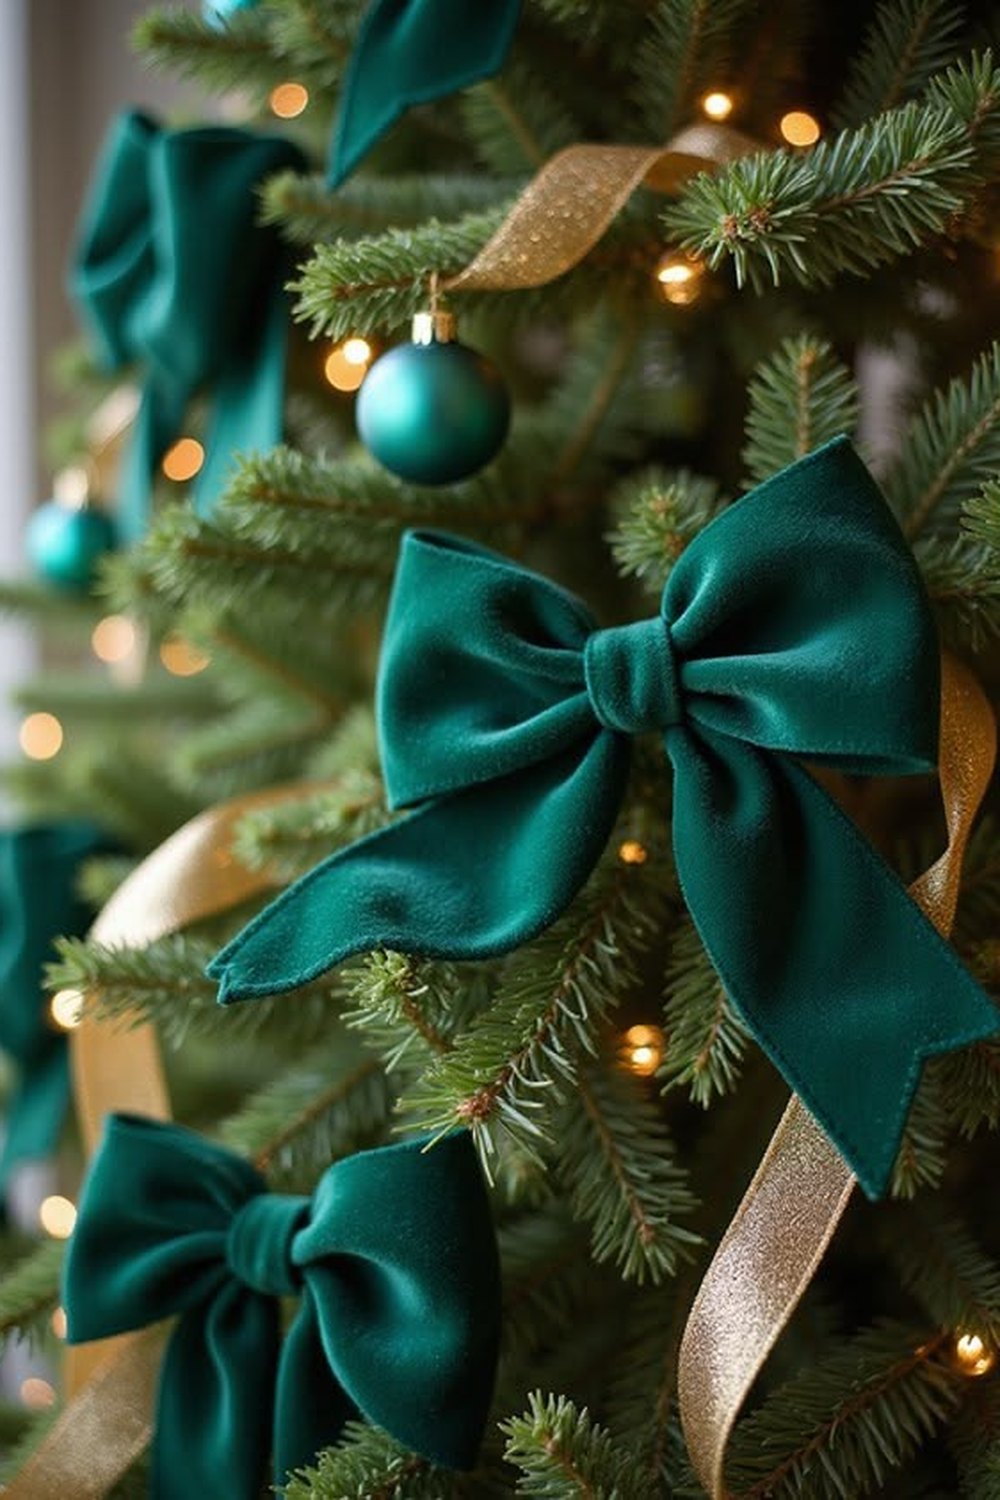
Bows in the tree's own colour family — quiet, deep and impossibly elegant.
A monochrome bow tree dresses every layer in one colour story: forest green velvet bows over green branches with green ornaments, or burgundy on burgundy for a moody evening tree. Because the bows match the foliage, the tree looks unusually full and deep, and the velvet supplies a soft matte texture that glossy baubles cannot.
Styling tip: vary the colour by at least three shades — deep forest, true emerald and a hint of sage, for example — and mix matte, satin and glossy finishes within it. One flat shade in one finish is the only way this look fails.
7. Bow and Bauble Pairs: A Bow Above Every Cluster
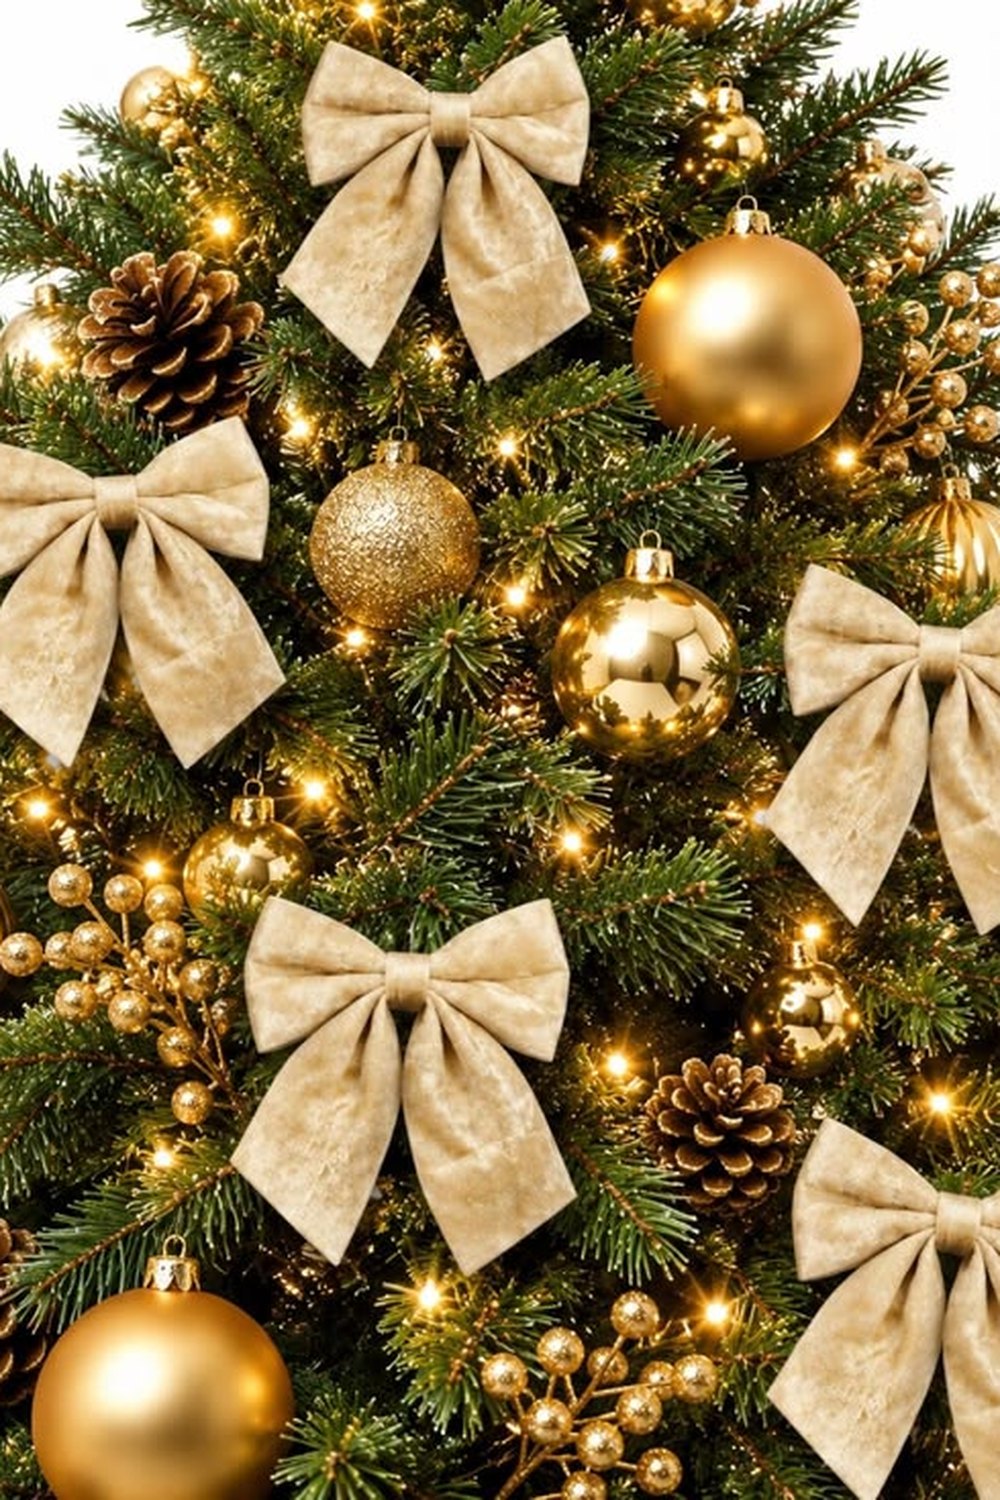
A bow crowning each ornament cluster makes every branch look composed.
Borrow a stylist's trick: group baubles in clusters of three, then tie a medium bow just above each cluster so the bow "presents" the ornaments below it. The pairing turns random branches into a series of little arranged moments, and the whole tree reads as designed rather than decorated in a hurry. The same trick works along a mantel garland.
Styling tip: wire the bow and its bauble cluster onto the same twist of floral wire before you start — one attachment per cluster makes hanging fast, and the spacing stays even because you compose each pair in your hands first.
Bows on Wreaths, Garlands & Mantels
8. The Six O'Clock Bow: The Classic Wreath Finish
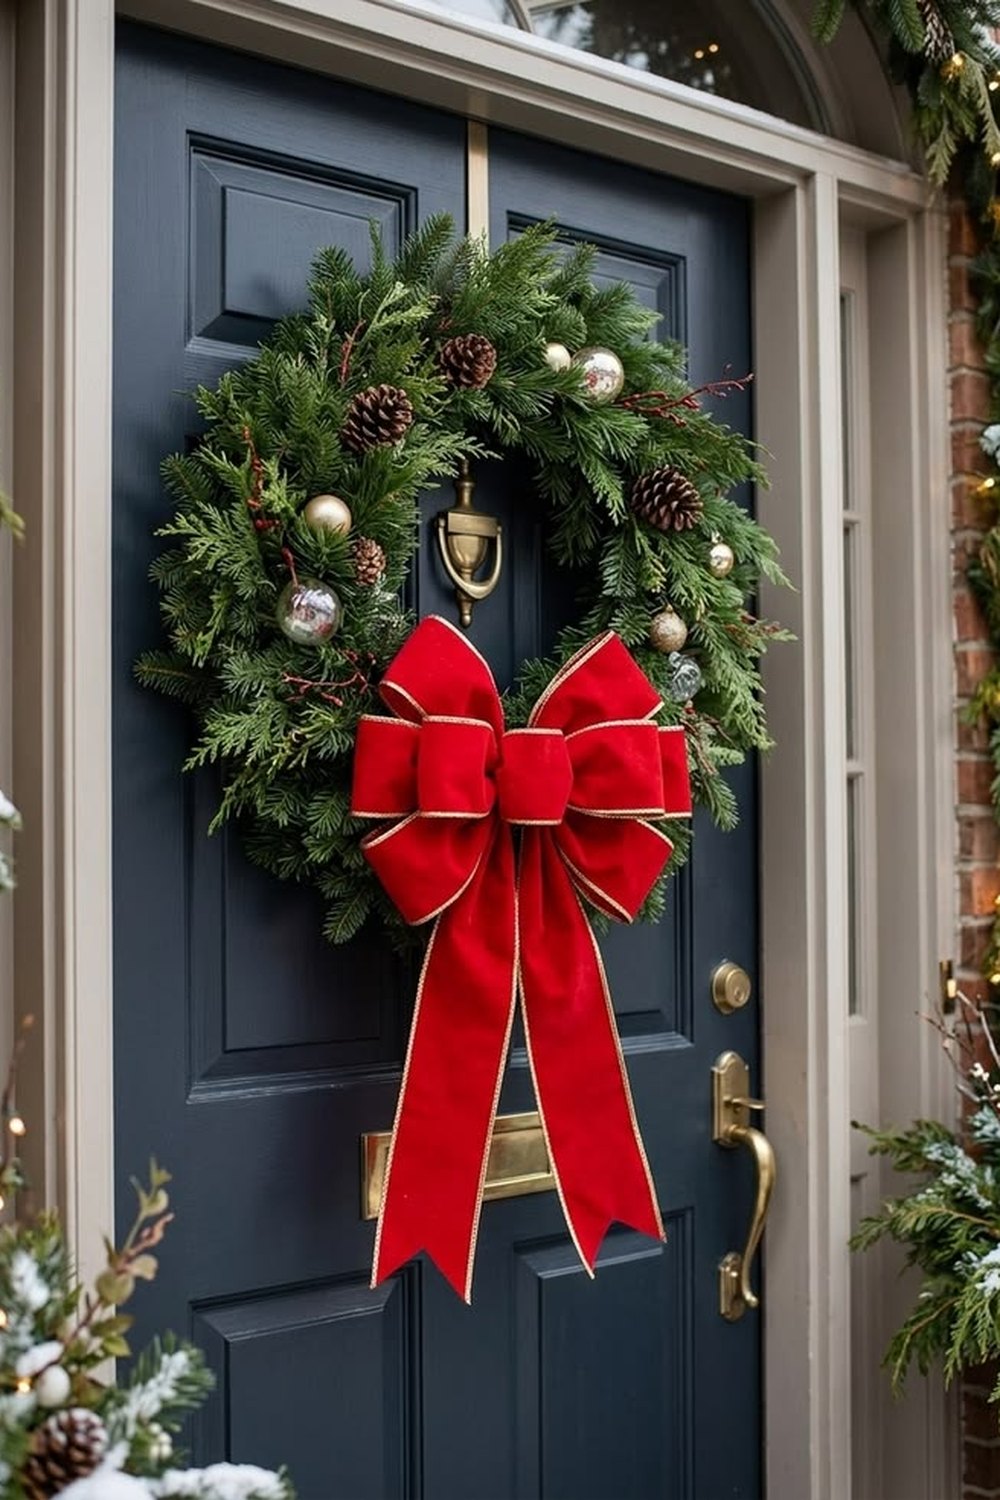
A generous bow at the bottom of the wreath — the finish that never dates.
The classic wreath bow sits at six o'clock, centred at the bottom of the circle, with two neat tails hanging below. It balances the wreath visually, gives the greenery a focal point, and works on every style from rustic pinecone to formal boxwood. If you tie only one bow this Christmas, this is the one that earns its ribbon.
Styling tip: scale matters — the finished bow should span roughly a third of the wreath's diameter. Wire it through the wreath frame itself, not just the foliage, and trim the tails so they end well clear of the door handle's swing.
9. Top Bow, Long Tails: The Wreath That Wears a Ribbon
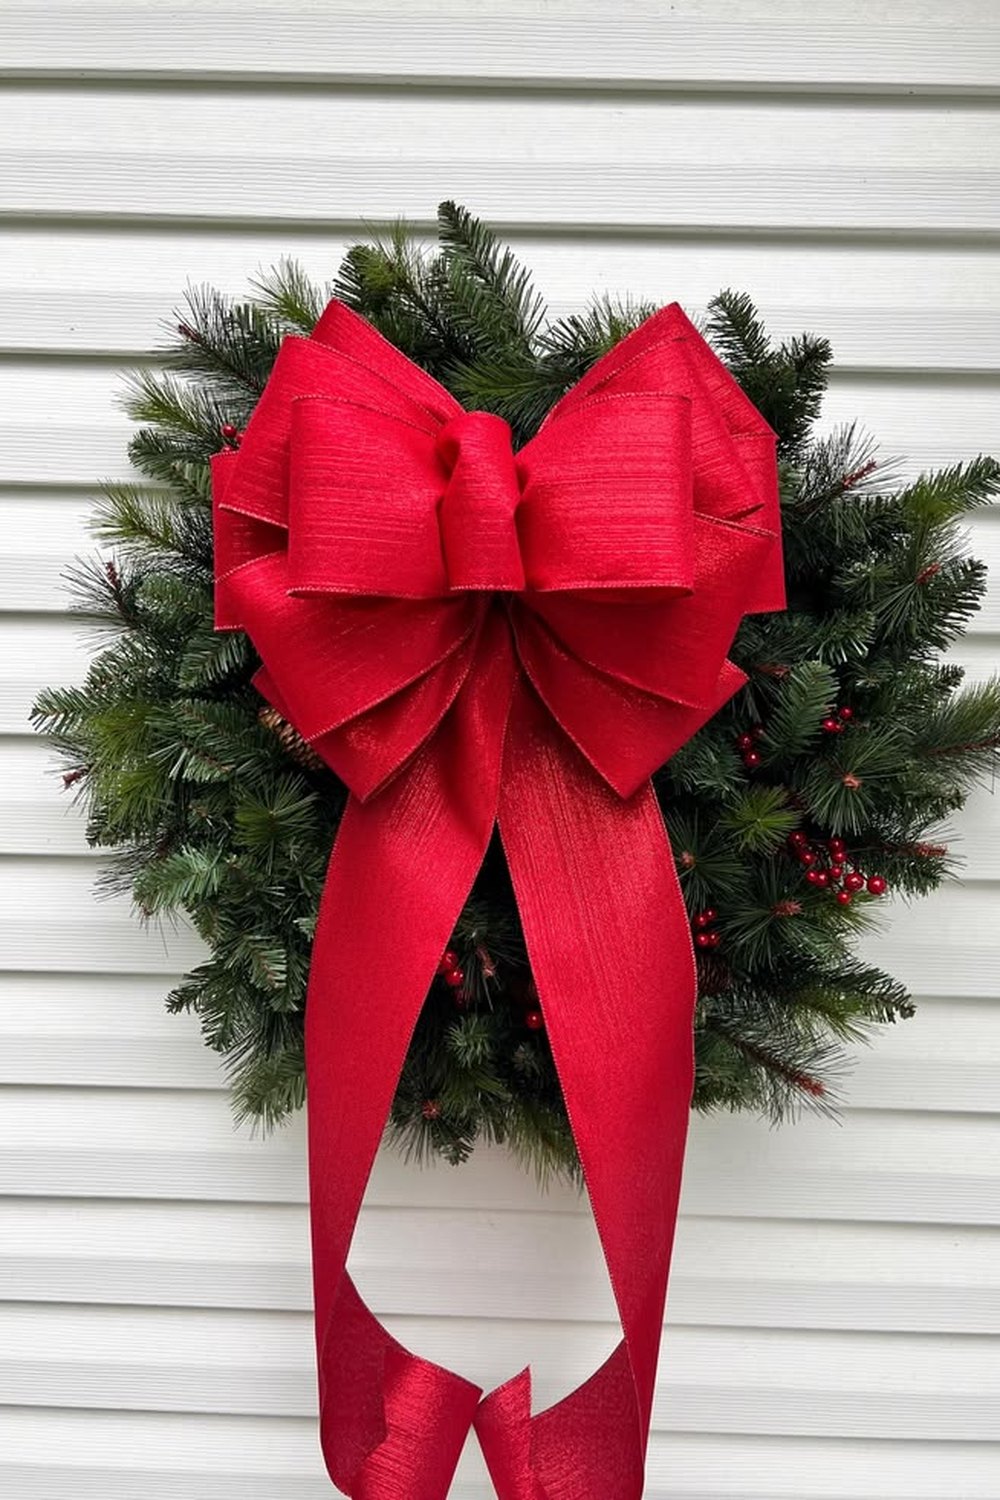
Long tails draped down both sides turn a simple green circle into a statement.
For a softer, more romantic wreath, place the bow at the very top and let two long tails fall down either side of the circle, almost to its bottom edge. The ribbon frames the wreath like curtains frame a window, and the look works just as well on a mirror or a kitchen window as on the front door.
Styling tip: cut the tails with a sharp diagonal or a dovetail V (fold the end lengthwise, then cut at an angle) so they finish cleanly, and give velvet tails a gentle steam so they hang straight instead of curling.
10. The Mantel Bow Swag: One Giant Bow at the Centre
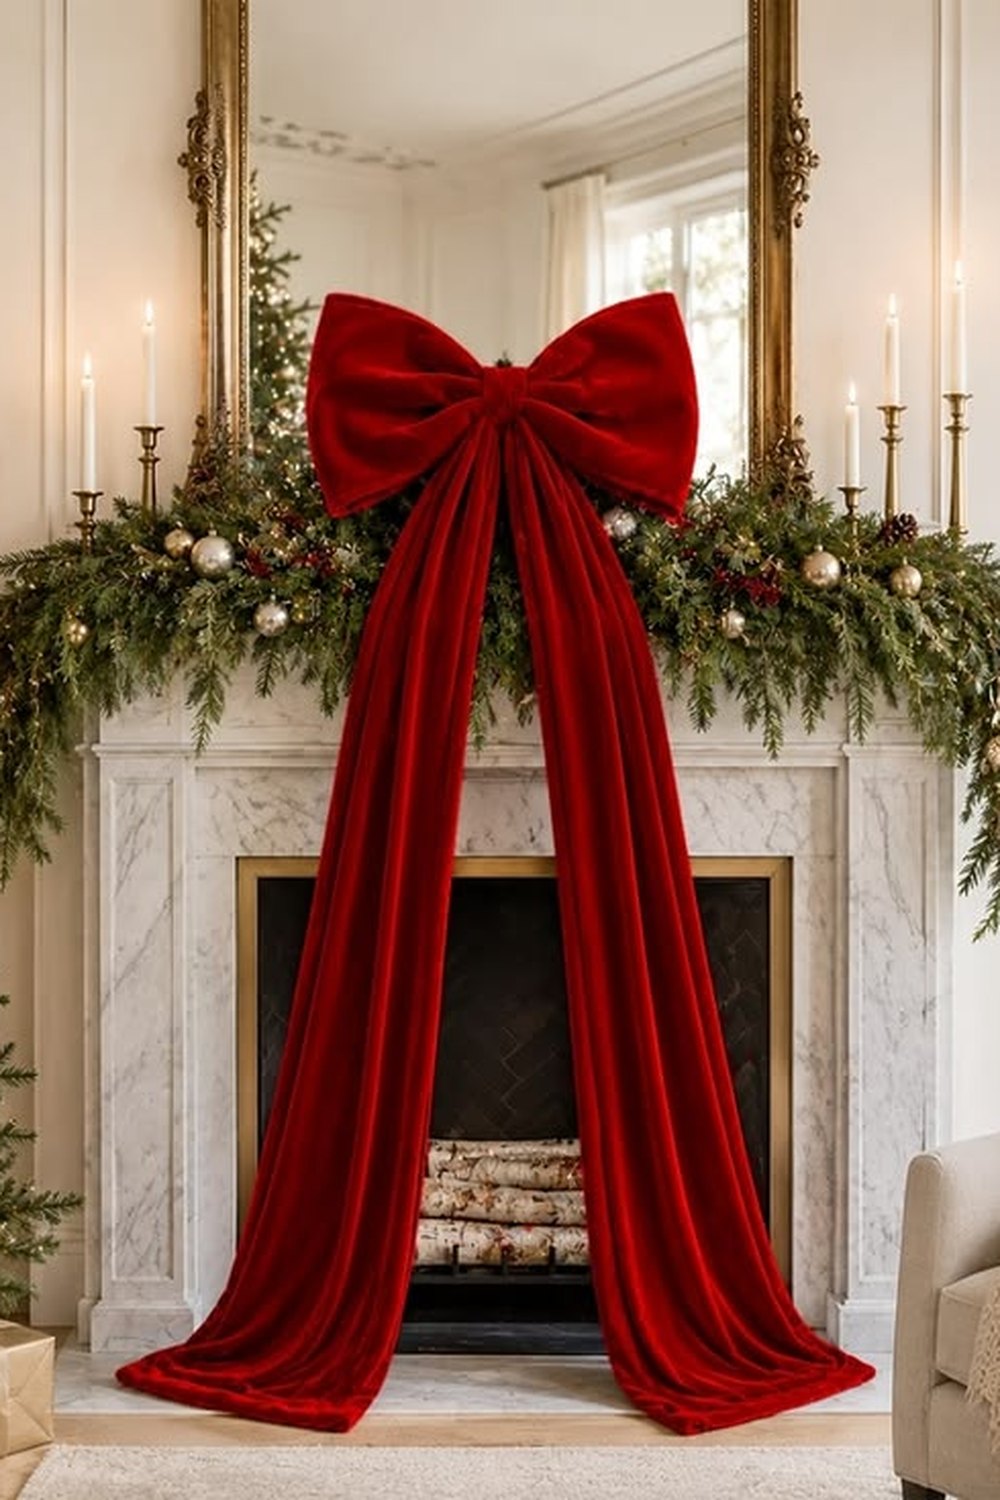
Forget the wreath above — this year the garland itself wears one enormous bow.
Swag the mantel garland across the front in one deep central dip and finish it with a single oversized velvet bow at the lowest point, tails hanging long over the fireplace opening. The bow does the job a wreath would normally do above the mantel, the look is pure 2026, and it is the kindest focal point for low mantels where a wreath crowds the ceiling.
Styling tip: a centre bow this size is heavy — wire it to the garland and anchor the wire to a small hook or the mantel edge itself, so the weight does not drag the whole swag down by Christmas week.
11. Bows at Every Dip: Garland Punctuation
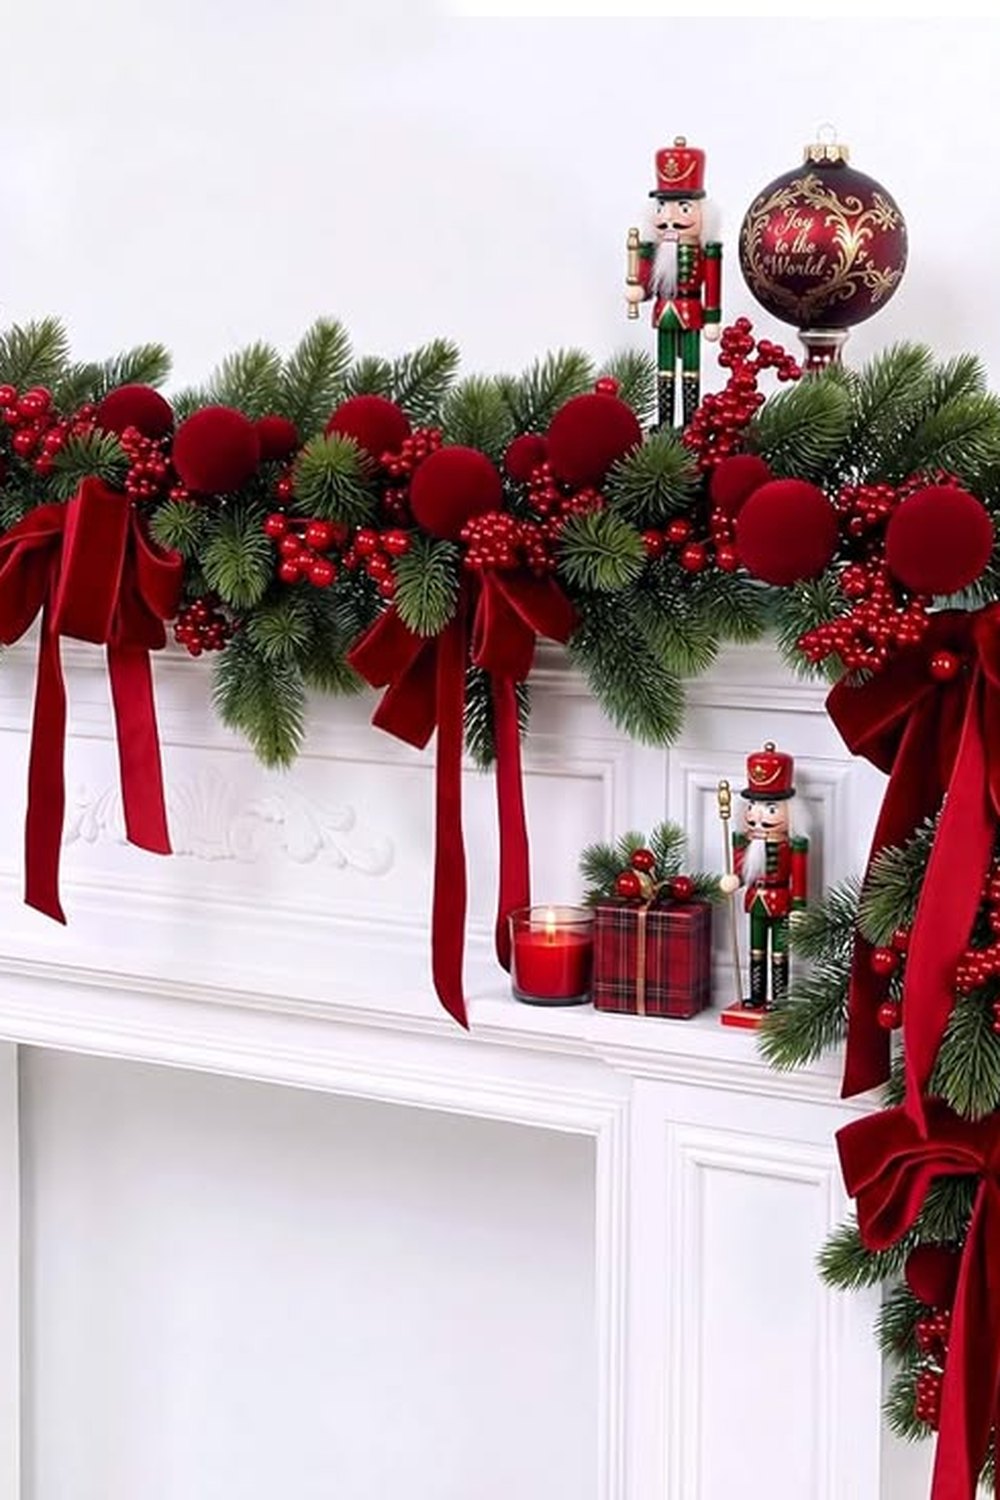
A bow at every swag point gives plain greenery a tailored rhythm.
Drape a plain greenery garland in even swags — along a mantel, a doorway or a headboard — and tie an identical velvet bow at the lowest point of each dip. The bows give the garland rhythm, hide the hooks and mechanics holding it up, and make inexpensive greenery look like a designed installation.
Styling tip: measure the spacing with a tape and keep every bow exactly the same size; with a repeated look like this, sameness is the entire effect. Shallow, numerous dips with neat bows look far more tailored than a few deep, sagging ones.
12. Banister Bows: The Staircase Done Properly
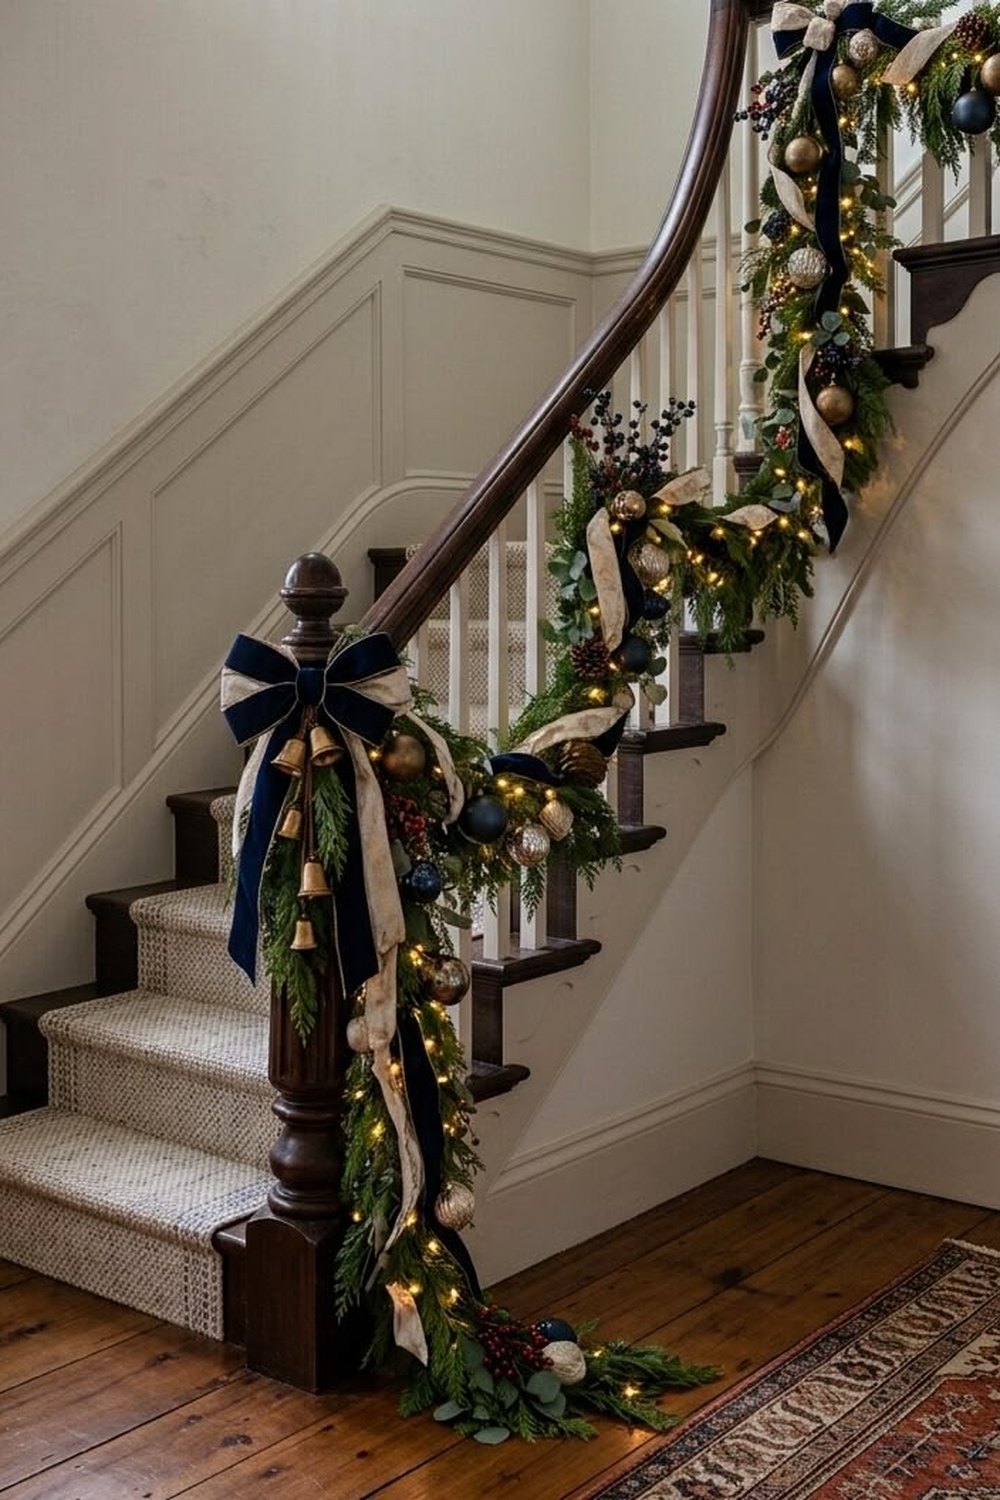
Bows at the posts and ribbon in the swags — the staircase becomes the welcome.
The staircase is the first thing guests see, and bows make it sing: swag a garland along the banister, then tie one full, generous bow at each newel post and smaller matching bows along the run. It connects the hallway to the living room scheme and takes twenty minutes once the garland is up.
Styling tip: tie bows on the stairwell face of the banister, not the handrail side, so hands glide past without crushing them. Attach everything with wire or ribbon ties — never tape or pins on painted wood.
13. Stockings Hung from Bows
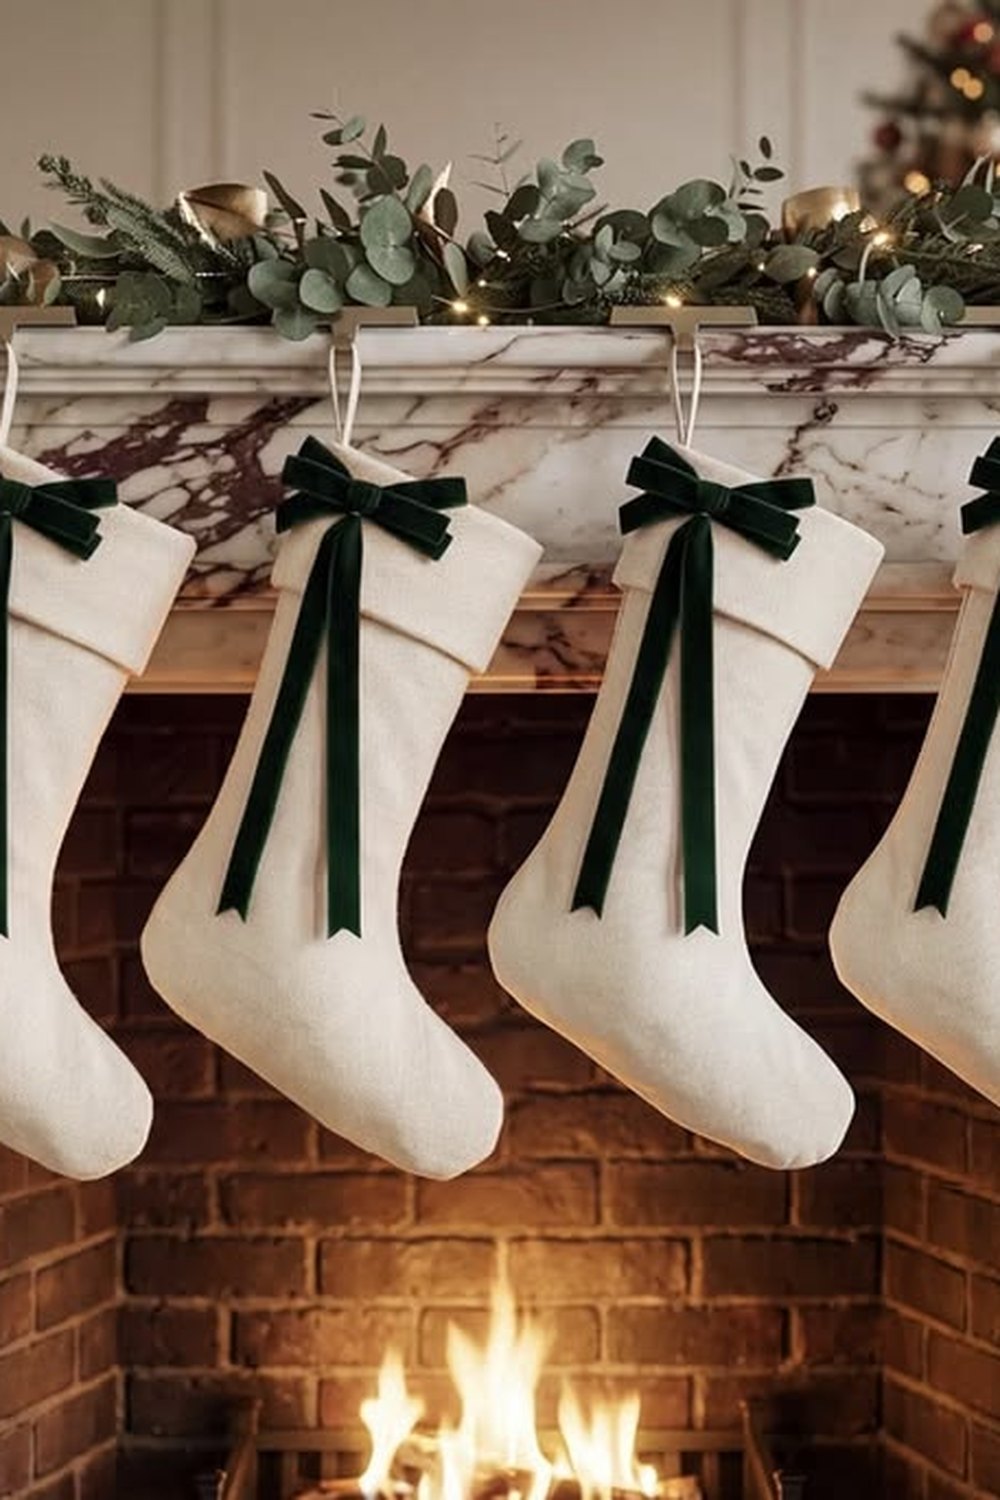
A little bow on every stocking cuff ties the whole mantel together.
Finish each stocking with a small velvet bow at its cuff — pinned at the front or tied around the hanging loop — using the same ribbon as the garland bows above them. The repetition is subtle but powerful: mantel, garland and stockings suddenly read as one designed arrangement instead of three separate decorations.
Styling tip: attach cuff bows with a small safety pin from inside the stocking so they survive being filled on Christmas Eve and can be removed for washing in January.
14. The Mirror Bow: A Wreath Hung by Its Own Ribbon
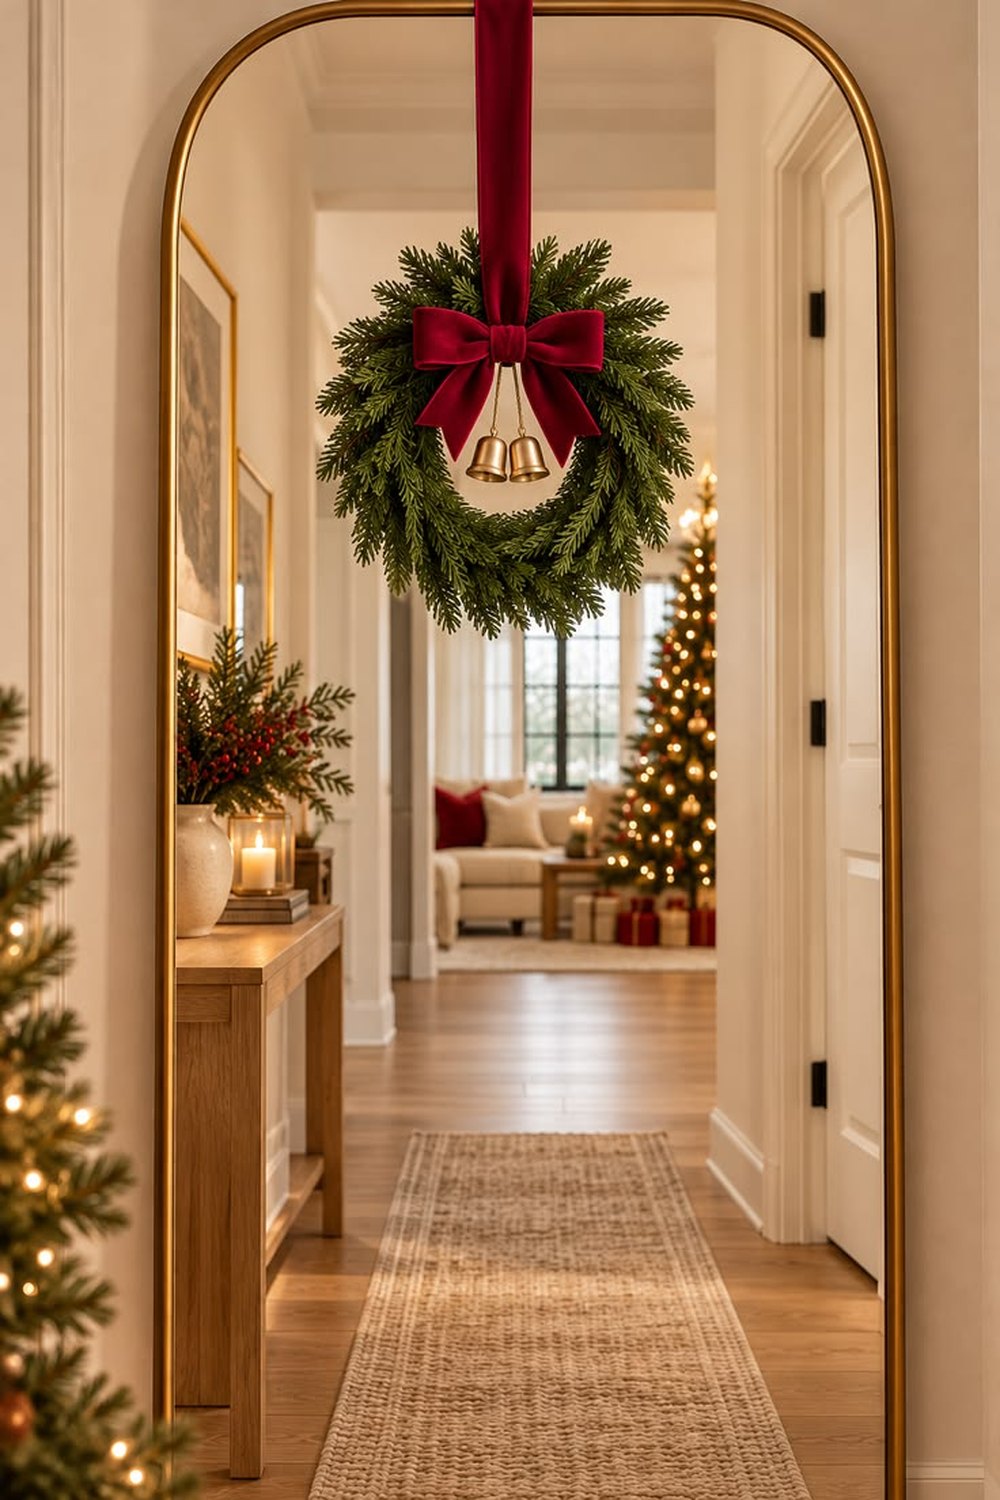
The hanging ribbon is the decoration — finished with a bow where it meets the frame.
Hang a wreath over a mirror or an internal window by looping wide velvet ribbon over the top of the frame, and tie a bow at the front where ribbon meets frame. The ribbon itself becomes part of the display, the glass doubles the glow behind it, and there is not a visible hook or wire in sight.
Styling tip: this is where double-faced velvet earns its price — the back of the ribbon shows in the mirror's reflection, so both sides need to be velvet. Measure the drop before you cut: frame top to wreath centre, plus bow allowance.
Bows Around the Room
15. Candlestick Bows: Tapers Dressed for the Evening
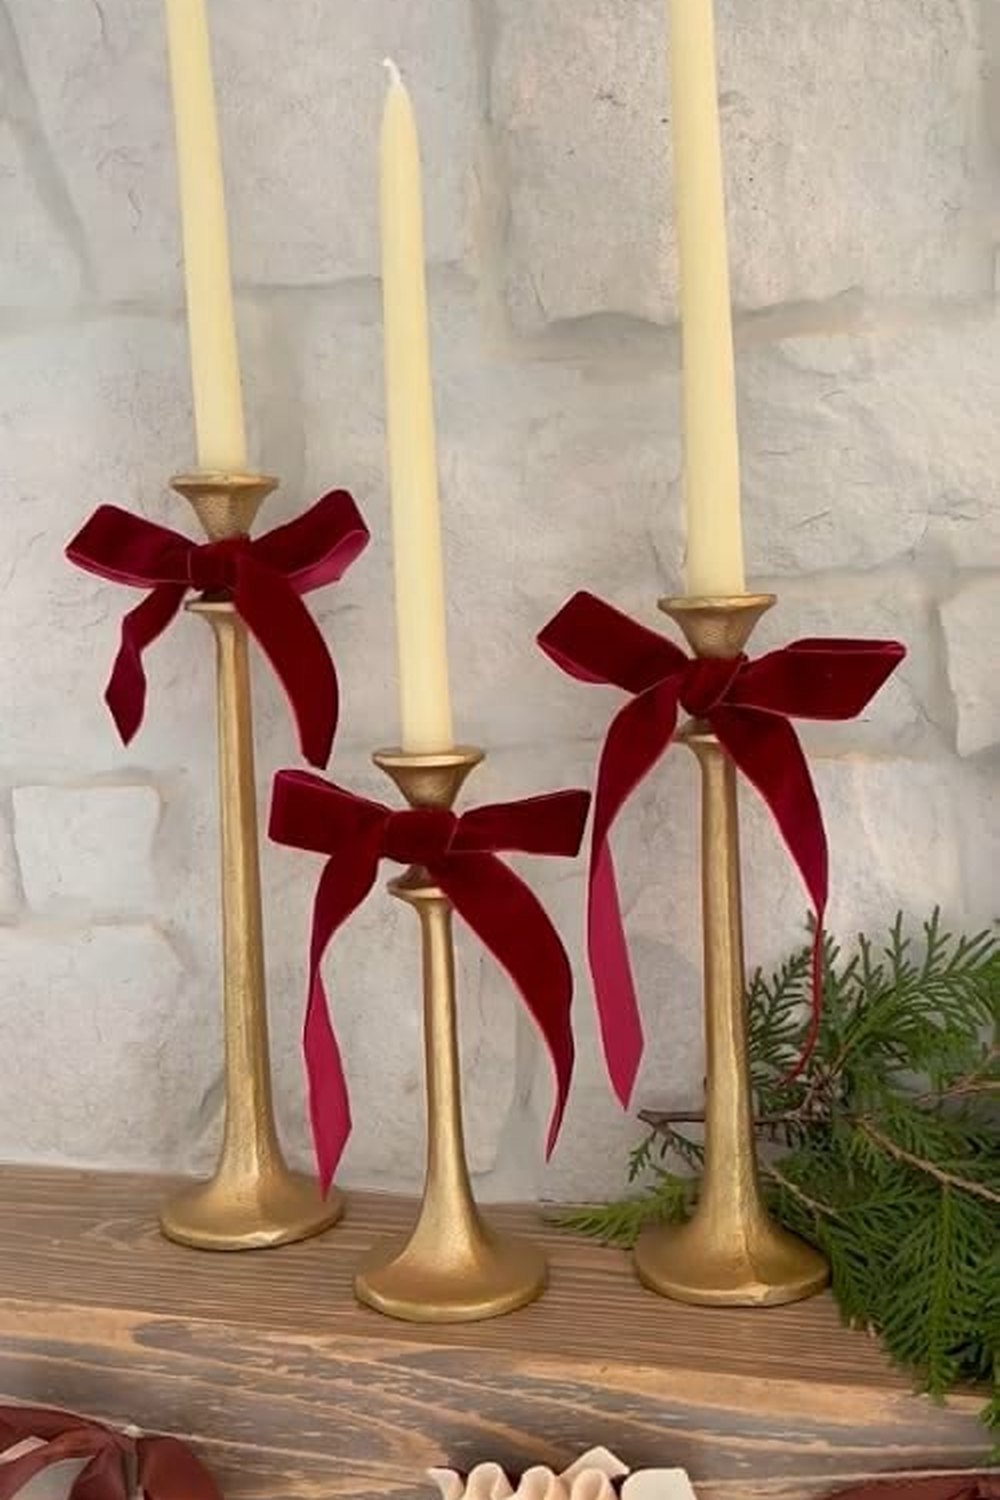
A small bow at the base of every taper — the detail guests photograph.
Velvet ribbon tied around candlesticks is one of the season's most-copied details, and one of the easiest: a small bow at the base or stem of each taper holder turns plain brass, black or glass candlesticks into Christmas pieces. Line them along the mantel, a windowsill or the centre of the table and the flames gain a soft frame of colour.
Styling tip: use narrow 2.5 cm ribbon and keep the bow low on the holder, well away from the flame. Flameless tapers make the look completely worry-free anywhere near greenery.
16. Chair-Back Bows: Seating That Joins In
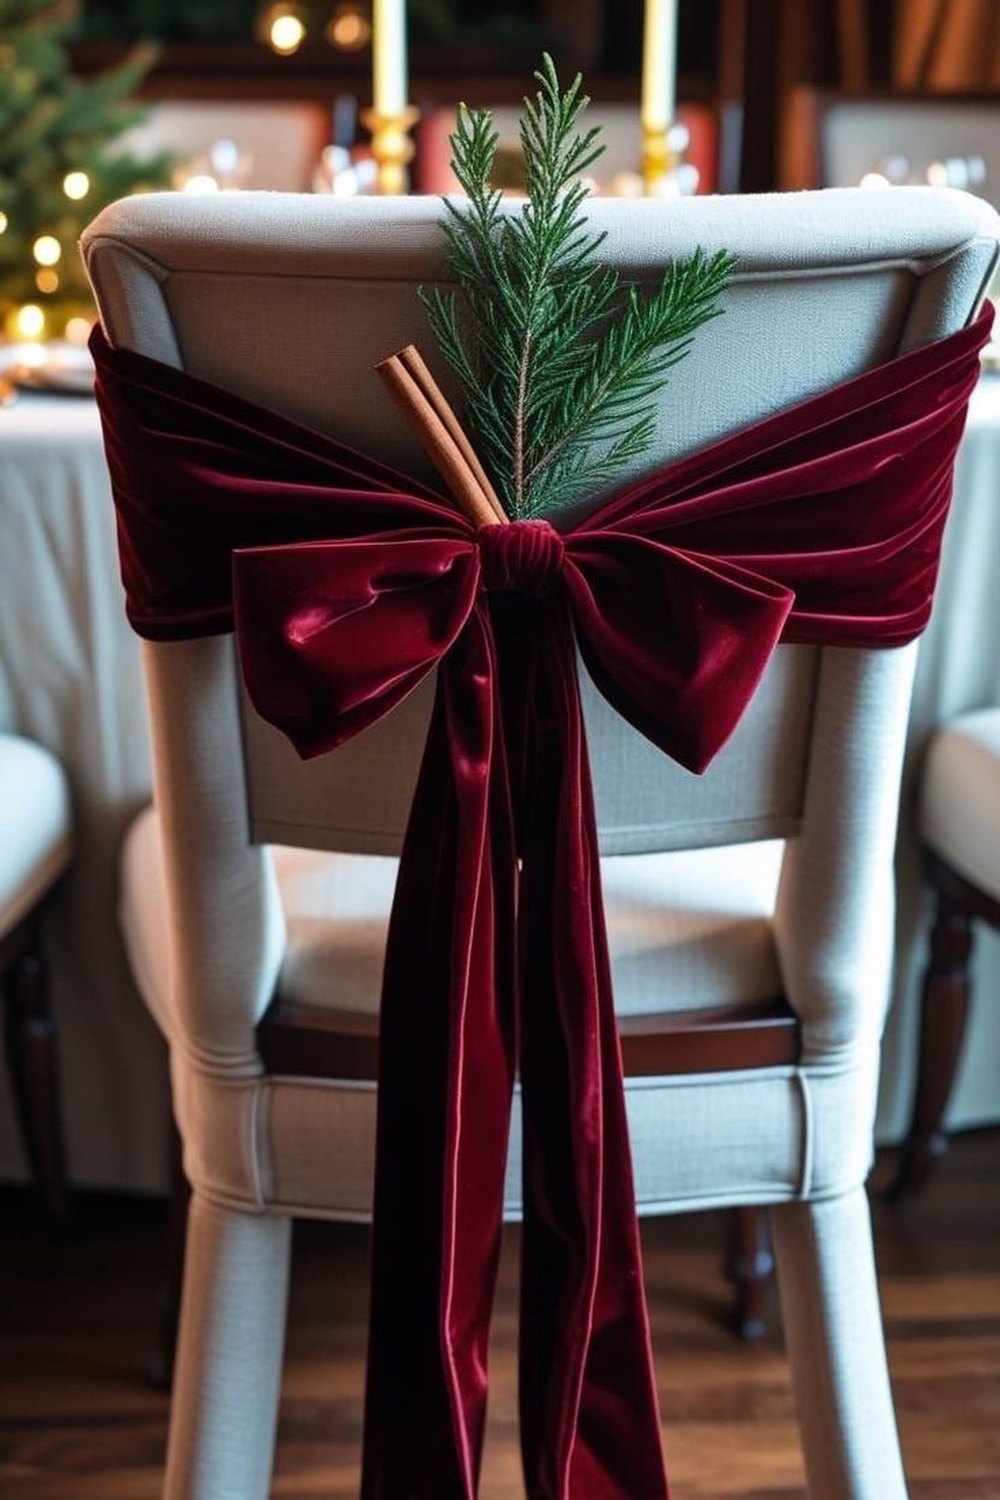
A bow on every chair back makes the whole dining set part of the display.
Tie a full bow at the top rail of each dining chair — with a small sprig of greenery or a pinecone tucked into its centre — and the seating becomes part of the decoration rather than furniture the decoration happens around. It is a favourite for Christmas dinner photographs, where every place setting gains a backdrop.
Styling tip: loop the ribbon around the rail and tie the bow on the loop, never with glue or pins, so chairs are unmarked in January. Size the bow to about half the width of the chair's top rail, and position it high so it sits above shoulder-blade level.
17. Lantern Bows: Glow with a Finishing Knot
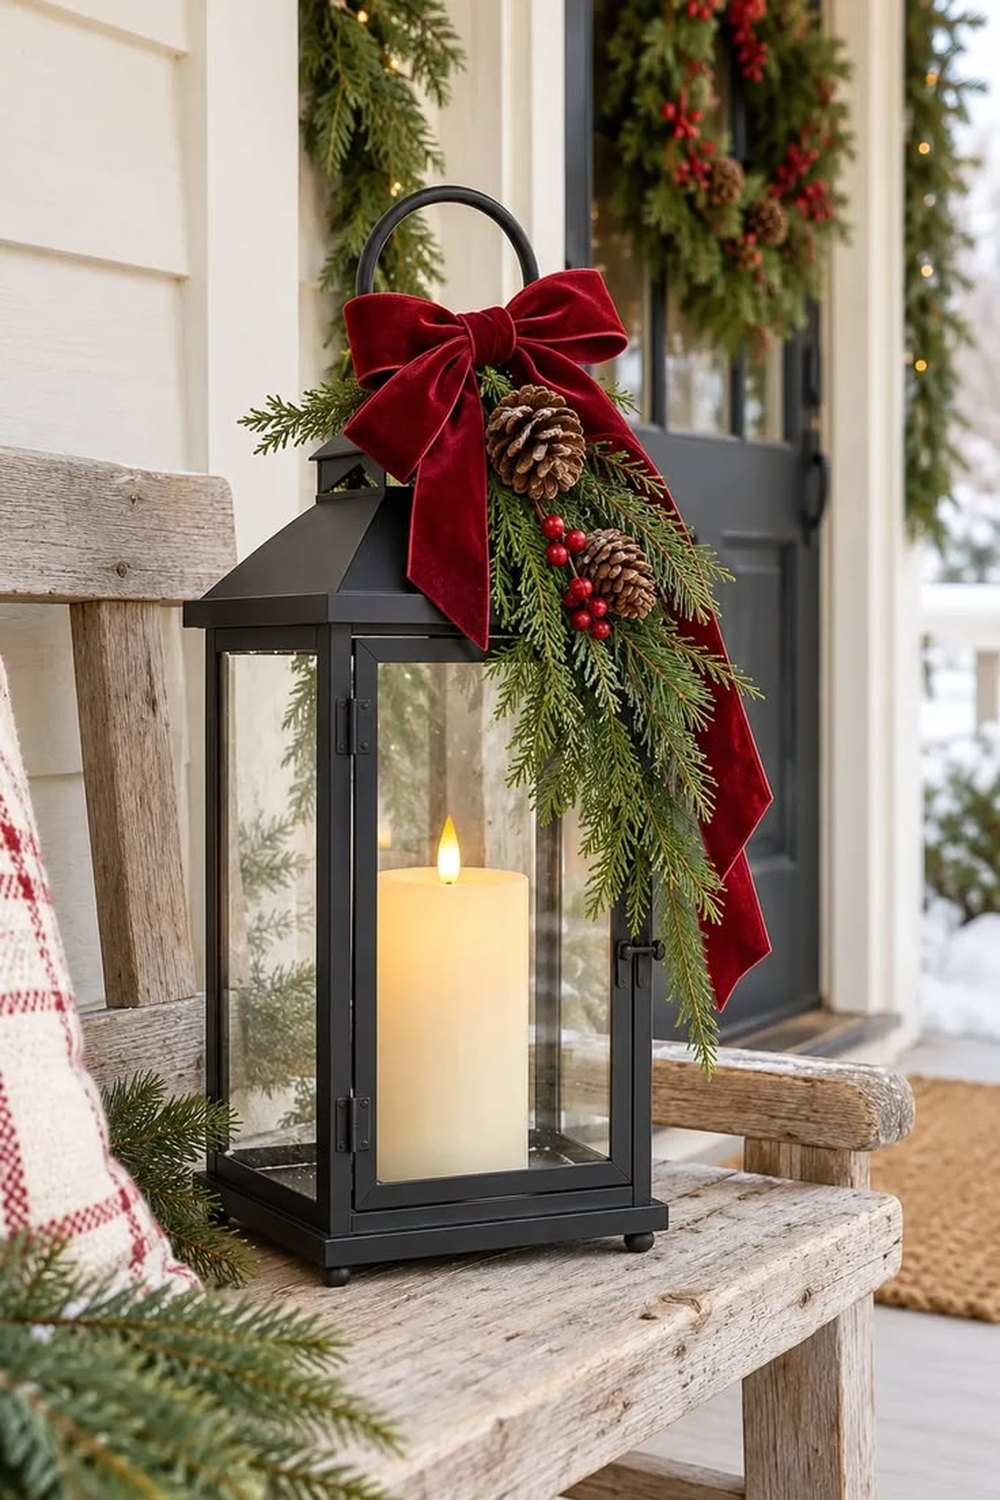
A bow and a sprig of greenery turn a plain lantern into a Christmas piece.
Lanterns work hard all year; one velvet bow tied at the handle or top ring, with a small sprig of pine or eucalyptus tucked behind it, promotes them to Christmas decor in a minute. Stand them on the hearth, beside the front door or along a hallway, wherever a pool of light is welcome.
Styling tip: wire the bow to the handle so it survives being carried in and out, and on real-candle lanterns keep ribbon clear of the top vent where heat escapes. LED lanterns remove the worry entirely.
18. Presents as Decor: Velvet Bows Under the Tree
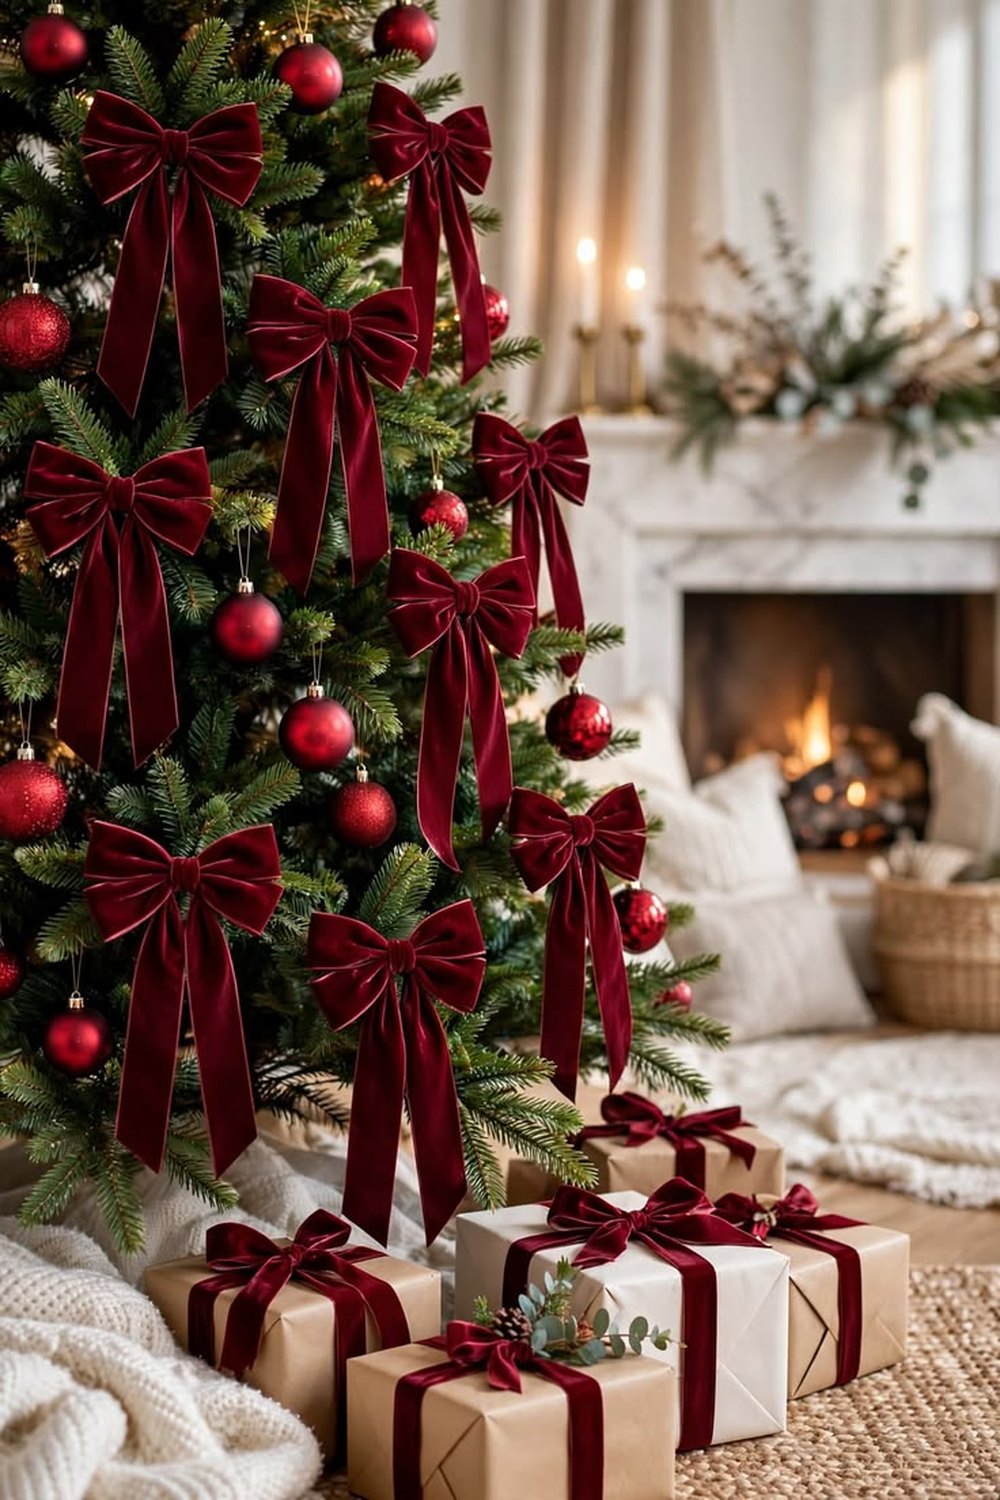
Wrapped early and wrapped beautifully, the gift pile becomes part of the room.
Wrap a few presents in the first week of December — or wrap empty boxes — using the same velvet ribbon as your tree bows, and let the pile under the tree echo the branches above it. Presents styled this way are not clutter waiting for Christmas Day; they are a deliberate layer of the room's decoration.
Styling tip: this is the one-bolt rule at its best — the same ribbon on gifts, tree and wreath makes the whole corner look planned. Put the dummy boxes with the biggest bows at the front of the pile where they show.
19. Cabinet and Door-Handle Bows: The Small-Space Trick
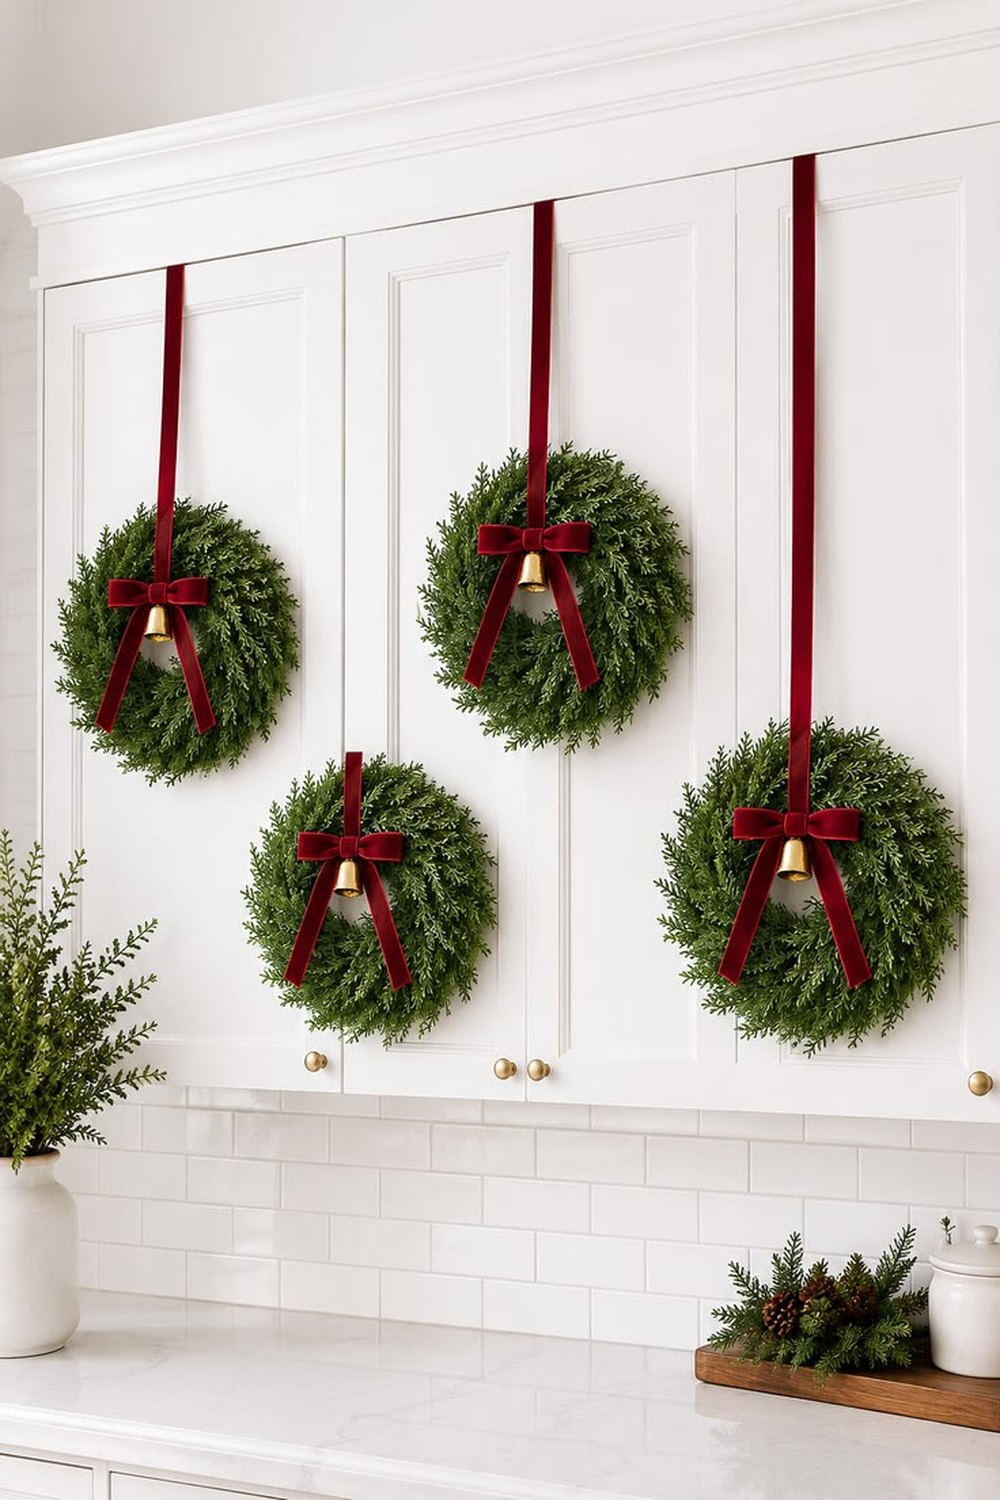
Mini wreaths and bows on cabinet doors — a Christmas kitchen in ten minutes.
Small homes need decorations that take no surface space, and this is the best of them: hang a mini wreath from a ribbon on each kitchen cabinet door and finish it with a small bow at the top. The same trick works on door handles — a bow and a small brass bell where hands pass daily.
Styling tip: hang cabinet wreaths from removable hooks on the inside of the door so the ribbon drapes neatly over the top edge. Wreaths around 15 cm suit standard cabinet doors without overwhelming them.
20. Curtain Bows: Tiebacks with Tails
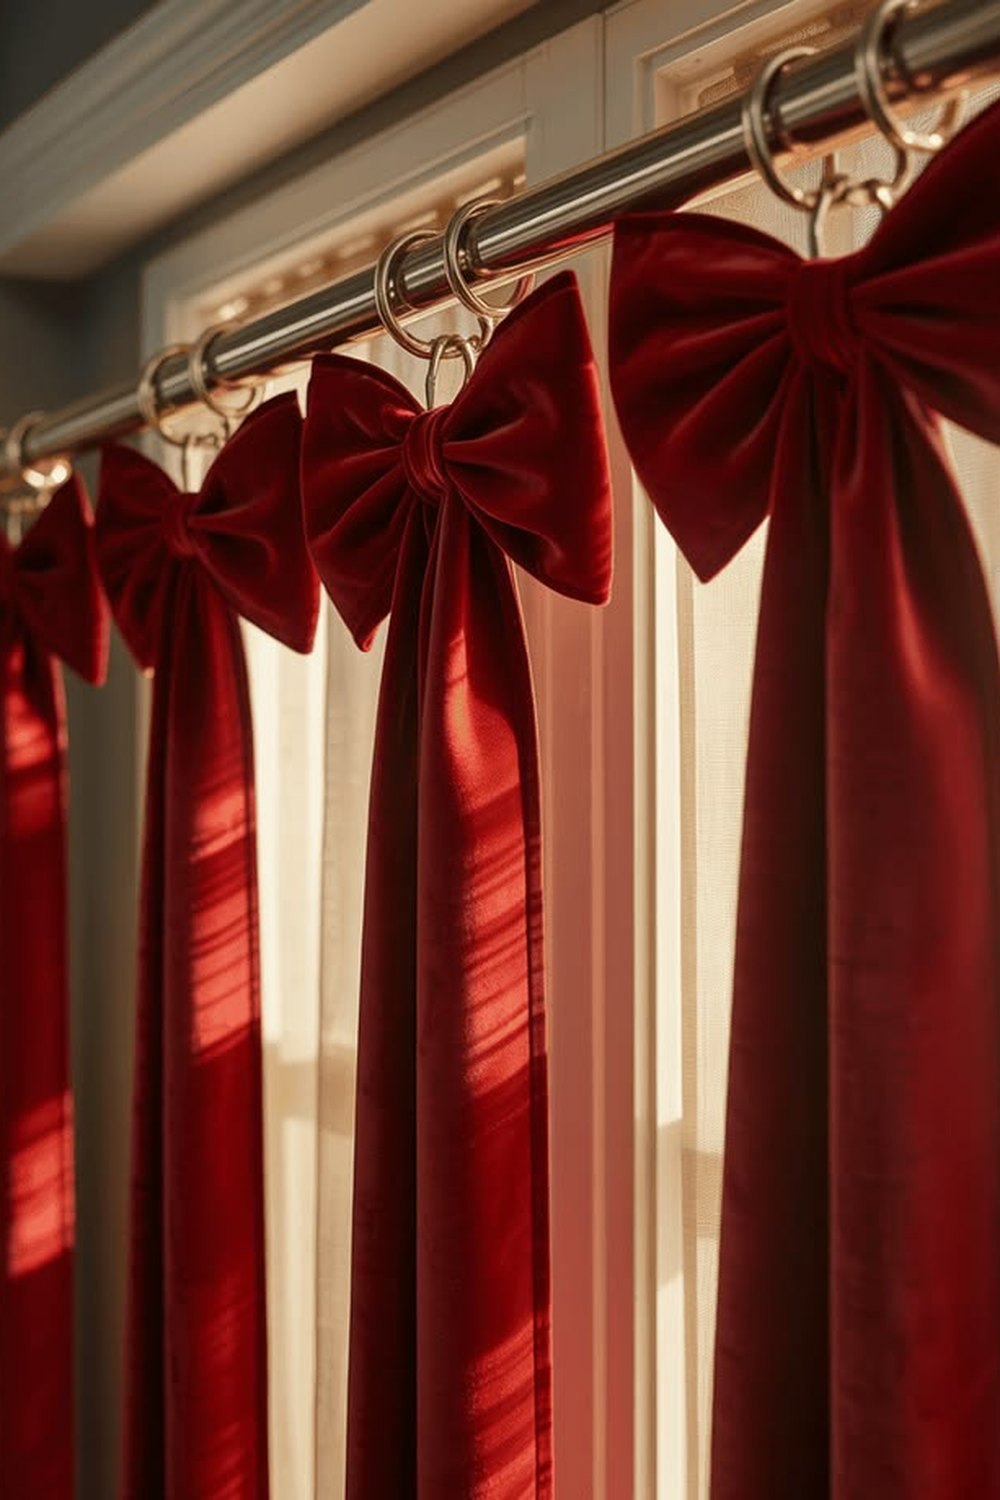
Swap the everyday tiebacks for velvet bows and the windows join the scheme.
Windows are the walls of a Christmas room once the tree lights reflect in them, and they deserve a ribbon detail too. Use wide velvet bows as curtain tiebacks for December, or tie smaller bows at the top corners of the window frame and at the curtain rod finials.
Styling tip: wired ribbon is essential here — the bow has to hold its shape against the weight and pull of gathered fabric. Match the tieback ribbon to the tree ribbon and the window and tree read as one composition.
21. The Basket Bow: Logs, Throws and Greenery
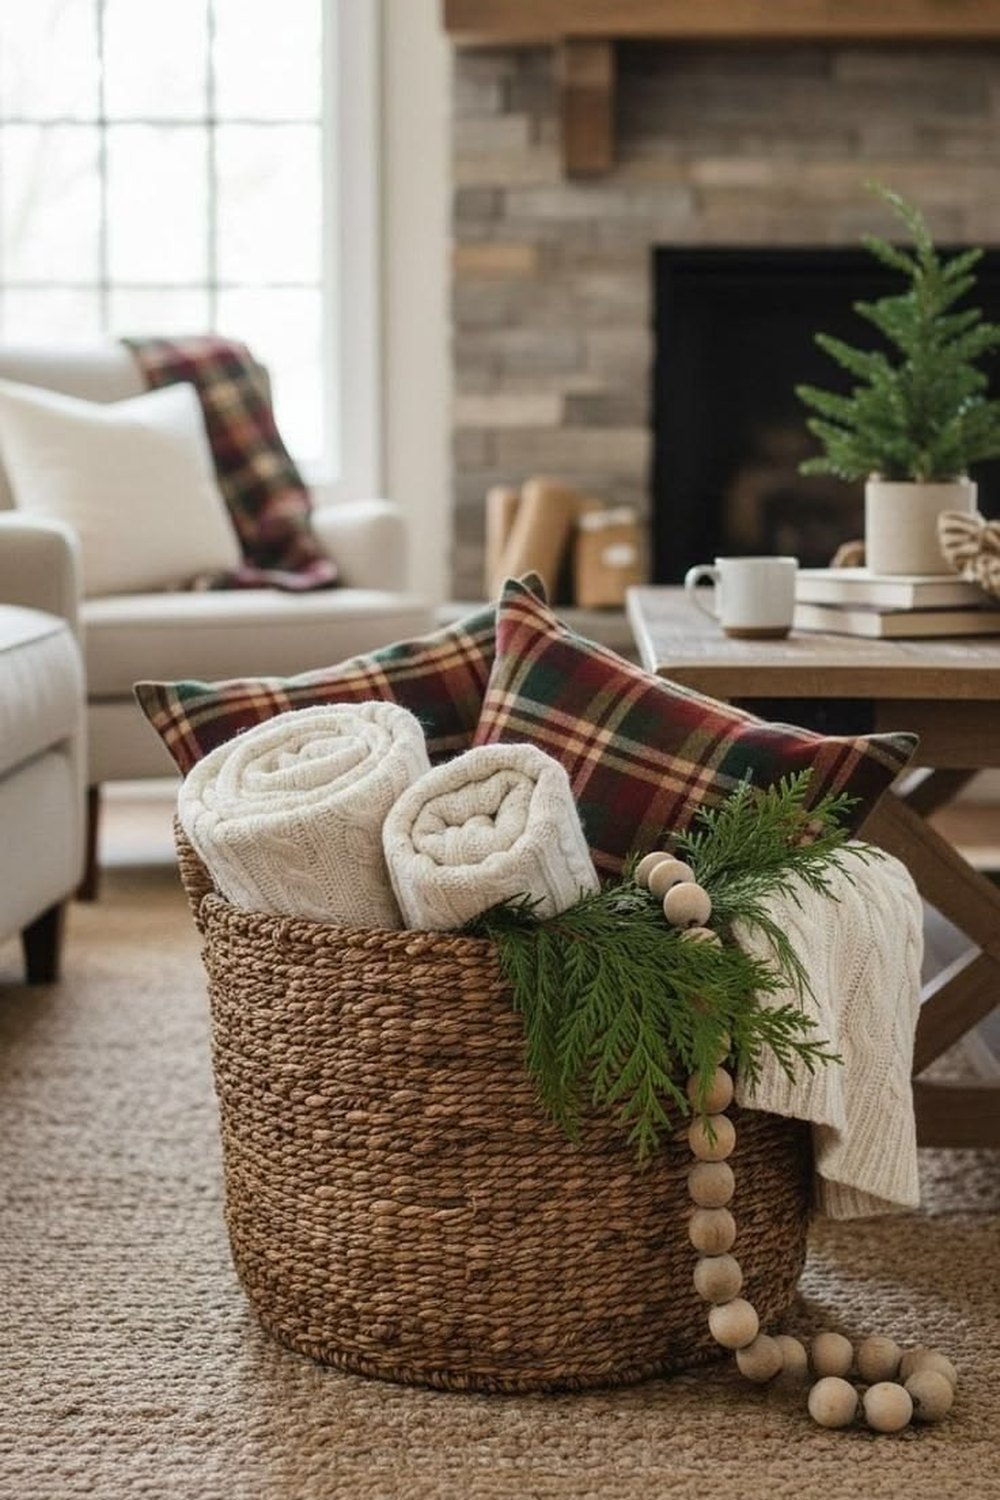
One bow on the log basket finishes the fireside corner like a full stop.
The baskets beside the fire — logs, blankets, kindling — are pure texture and no colour, which makes them the perfect stage for one generous bow tied to the handle. It softens the rustic weave, ties the hearth to the tree across the room, and takes under a minute.
Styling tip: choose a natural-toned velvet — khaki, olive or oatmeal — for rustic baskets, and wire the bow to the handle so it stays put when the basket is carried. A sprig of pine tucked behind the knot completes it.
Bow Table Styling
22. Velvet Bow Napkin Ties
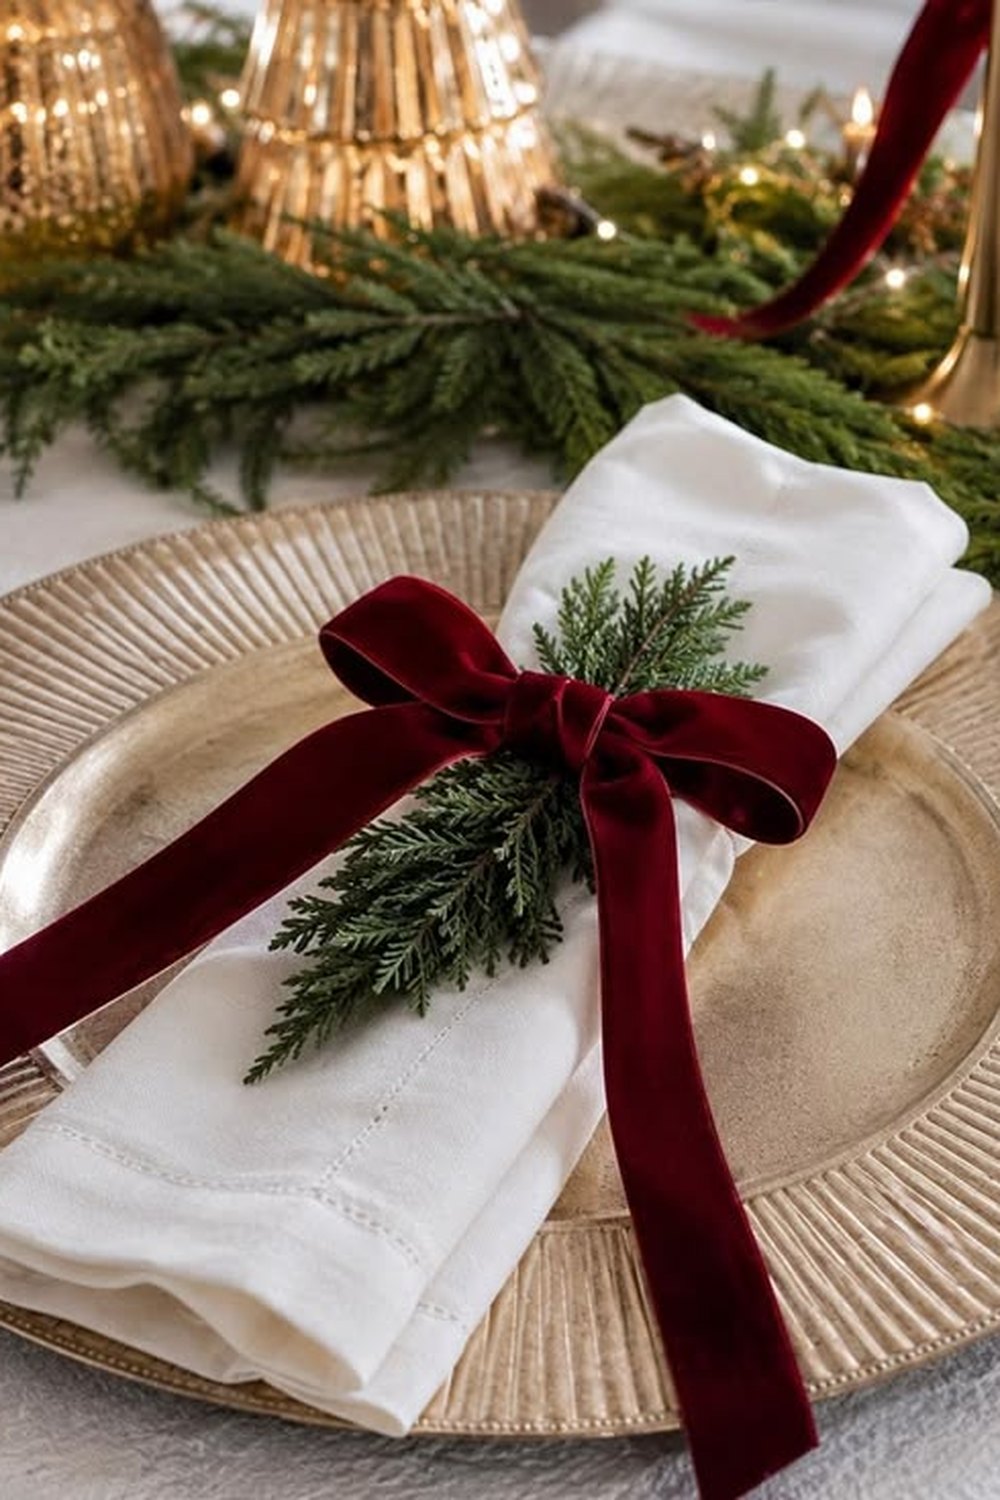
A bow instead of a napkin ring — soft, romantic and endlessly copied.
The table detail of the season is a napkin tied with ribbon: fold each linen napkin, wrap a length of velvet ribbon around its middle and finish with a neat bow, then lay it on the charger or plate. It softens the whole place setting, replaces napkin rings entirely, and guests genuinely keep them as souvenirs.
Styling tip: pre-tie the bows onto closed ribbon loops a few days ahead, then slide a loop over each rolled napkin as you set the table — far faster than tying twelve bows at the last minute. Use 2.5 cm velvet and dovetail the tiny tails.
23. Bow Place Cards and Crackers
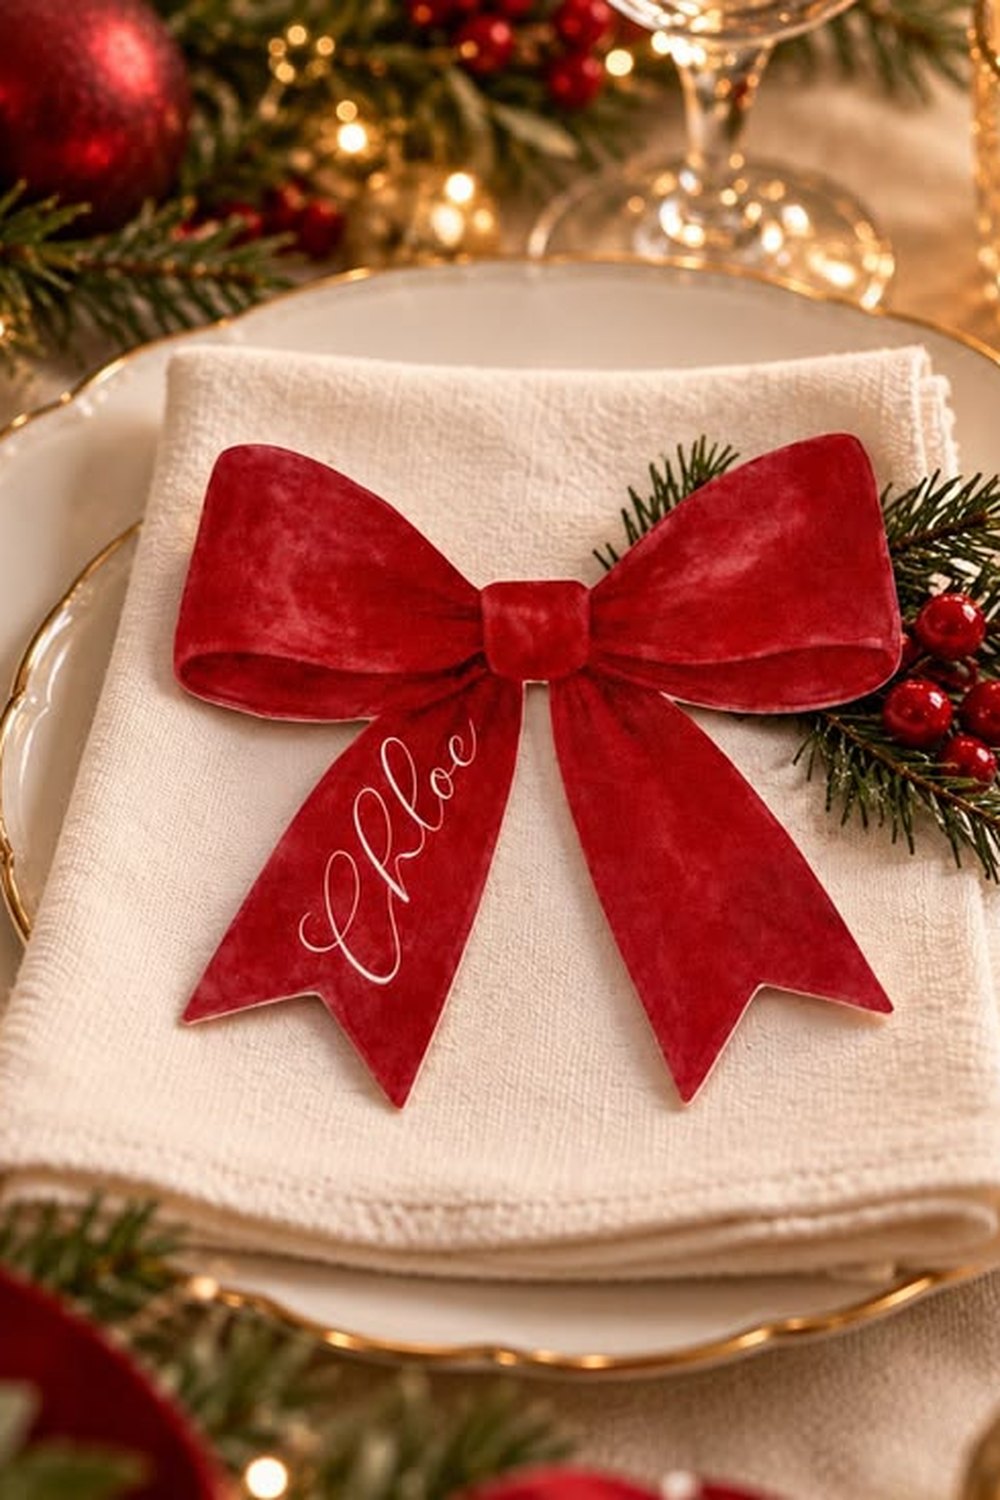
A bow holding each name card makes every guest feel expected.
Tuck each place card into the centre knot of a small bow and set it above the plate or lean it against the glass. Tie the same ribbon around the Christmas crackers while you are at it, and the whole setting — napkin, card, cracker — speaks one ribbon language.
Styling tip: make these bows assembly-line style the weekend before; write the cards first, then attach them, so ink never smudges on velvet. Keep them the exact ribbon and colour of the napkin ties for a designed set.
24. The Bow Runner Centrepiece
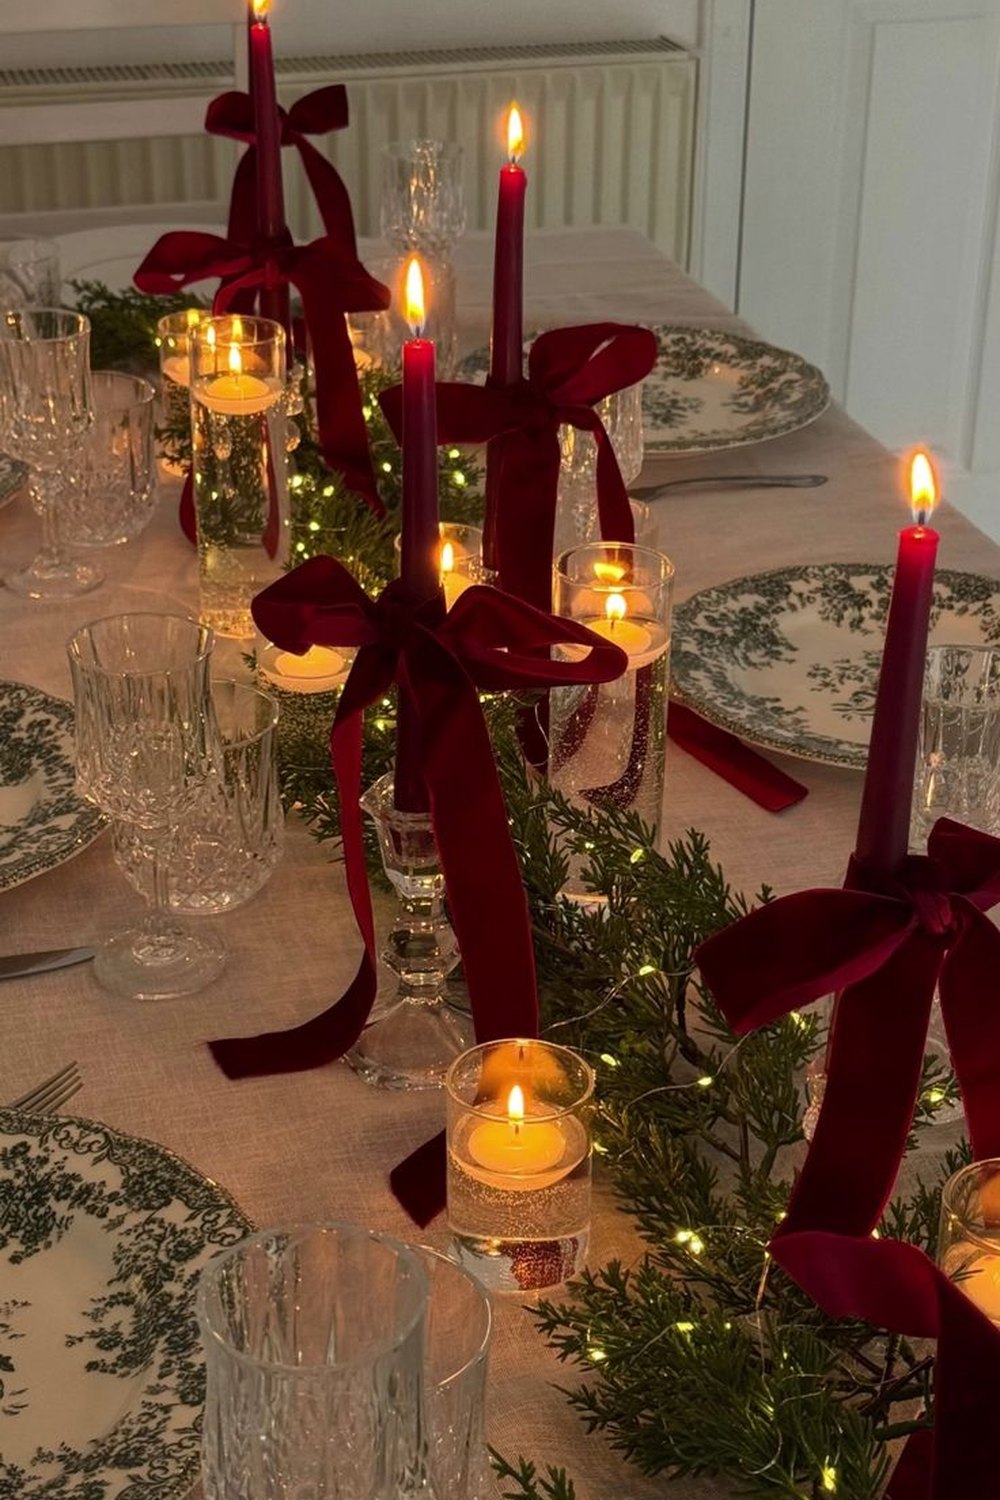
Small bows spaced along a greenery runner stitch the whole table together.
Run a low garland or loose greenery down the centre of the table, weave in taper candles, then tie small velvet bows along its length at even intervals. The bows give the runner rhythm and colour, echo the napkin ties at every setting, and turn a simple line of greenery into a finished centrepiece.
Styling tip: place a bow roughly every 30–40 cm and keep the whole arrangement under about 30 cm high so guests can see each other over it — the conversation rule matters more than any decoration.
25. Tiny Bows on Glass Stems and Bottles
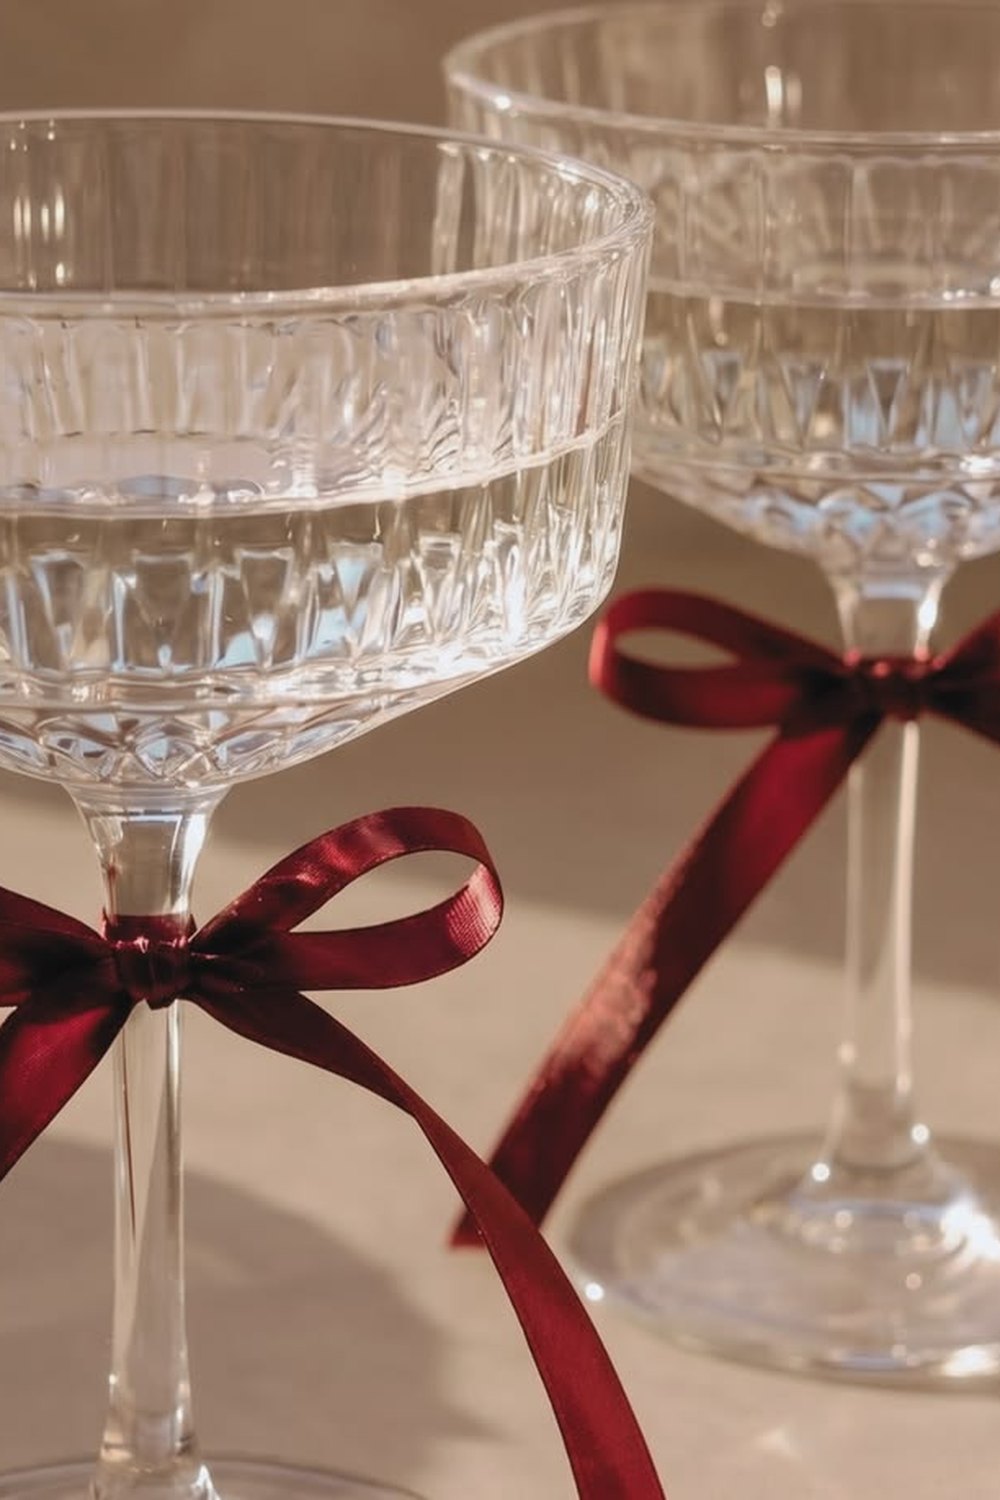
The smallest bows of all — on glass stems, they catch the candlelight.
For a delicate finishing detail, tie miniature bows around wine glass stems, the neck of the carafe and the bottles on the table. They weigh nothing, cost pennies of ribbon, and in candlelight the little knots of velvet against glass look genuinely luxurious.
Styling tip: use the narrowest ribbon you own — around 1 cm satin or velvet — and tie rather than glue, so everything washes clean afterwards. Make a few spares; tiny bows have a habit of vanishing into napkins.
26. Bow-Tied Serving Pieces
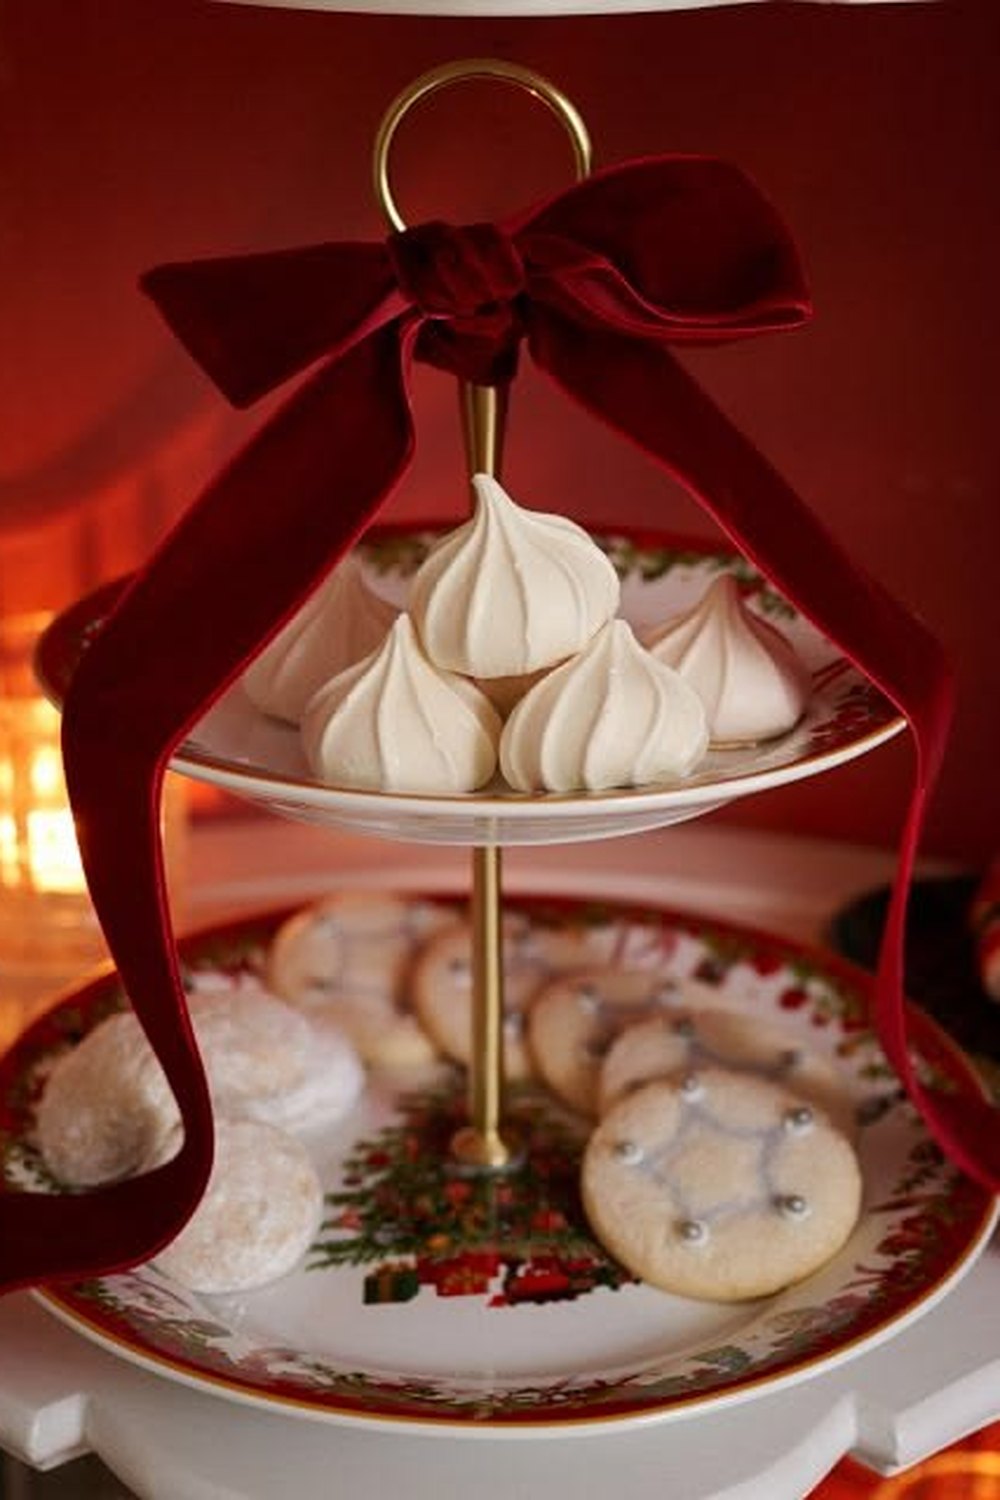
Cake stands, bread baskets and jugs all look dressed with one bow each.
Whatever serves the food can join the theme: a bow on the stem of the cake stand, the handle of the bread basket, the neck of the gravy jug or the end of a serving board. It takes seconds per piece and makes the buffet or dessert table look styled rather than just set out.
Styling tip: tie each bow on a removable ribbon loop slipped over the handle or stem, so serving pieces go into the wash bow-free. Keep ribbon clear of food surfaces — the bow decorates the vessel, never the food.
27. The Scalloped Bow Runner: Bows as the Runner Itself
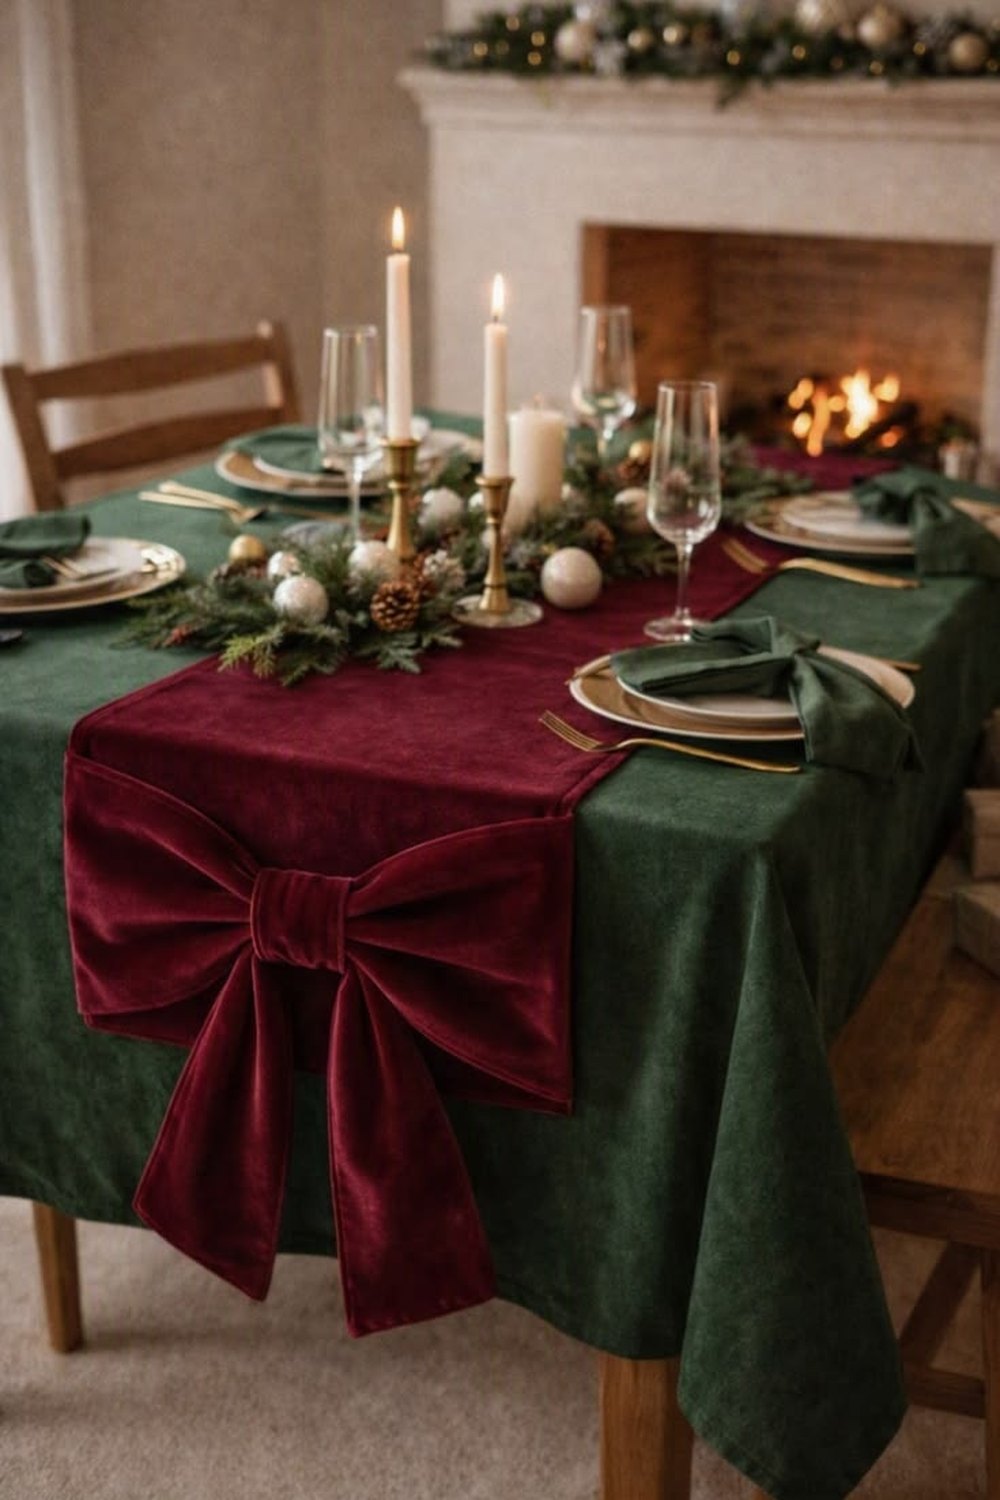
A plain runner edged with bows — the retail detail of the season, easy to copy.
One of this year's signature table looks is a runner trimmed with bows — a row of small bows along each long edge or down the centre of plain linen. You do not need to buy one: pin or tack ready-made bows along a runner you already own and the update costs a metre of ribbon.
Styling tip: pin rather than sew so the runner returns to normal in January, and use a ruler for the spacing — even intervals are what make it read as a bought designer piece rather than a craft project.
28. Bow-Wrapped Pillar Candles
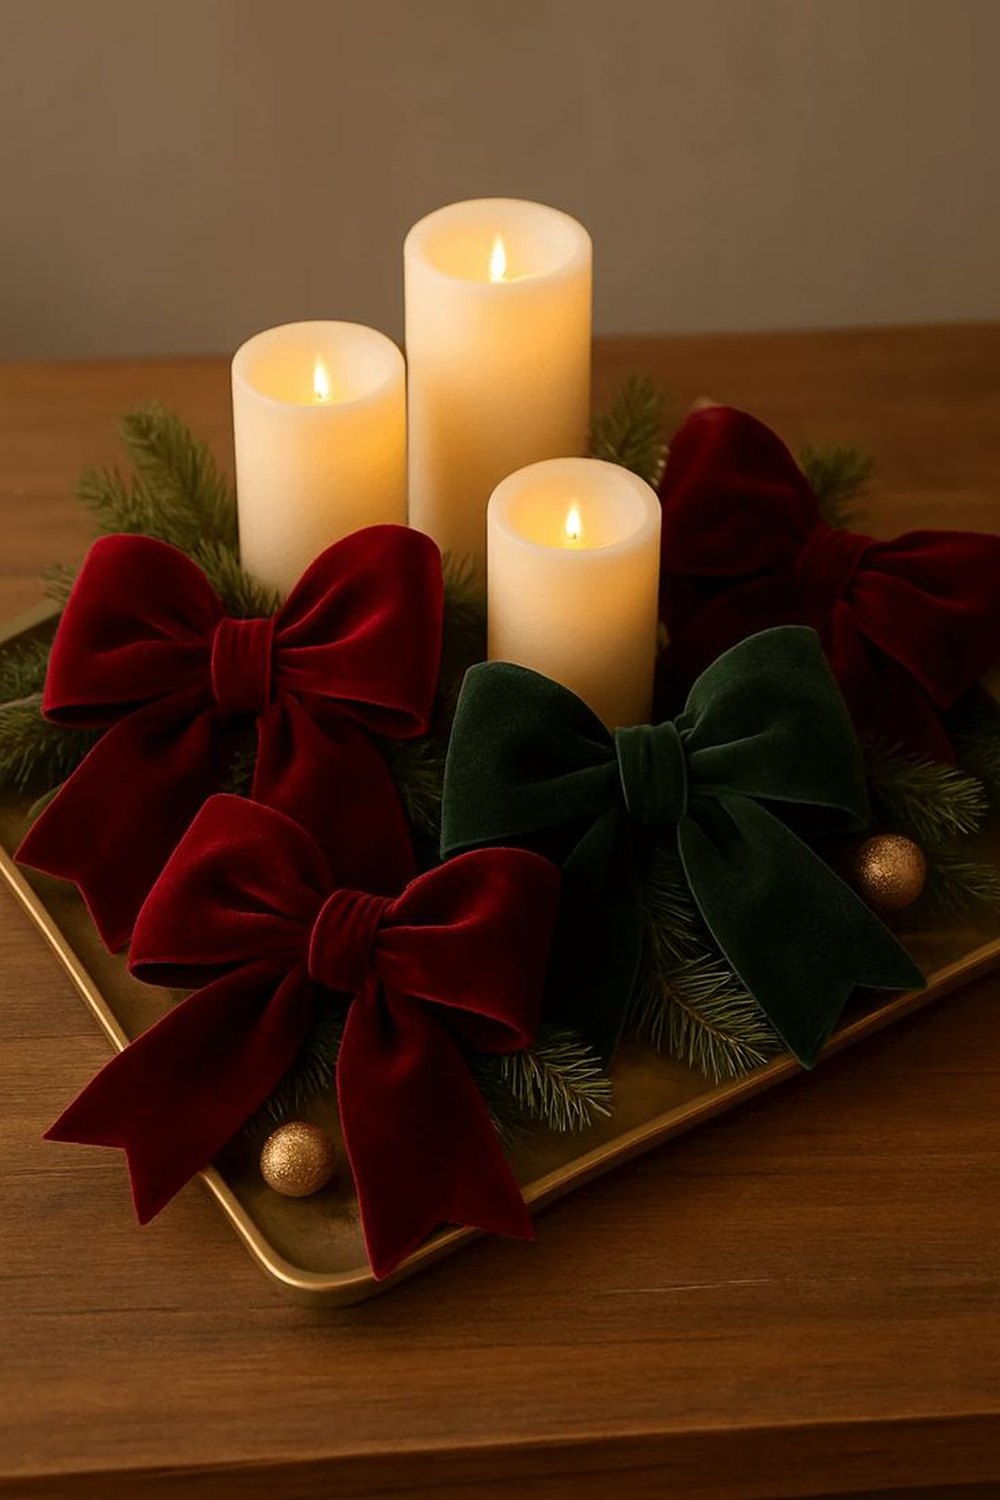
Ribbon around a pillar candle turns the plainest candle into a centrepiece.
Wrap a band of wide velvet ribbon around the middle of each pillar candle and finish it with a small bow at the front, then group three candles at staggered heights on a tray or board. The ribbon gives plain candles a tailored, gift-wrapped quality that suits any table colour story.
Styling tip: flameless wax pillars make this idea entirely worry-free and reusable. If you use real candles, set them inside hurricane glasses and keep the ribbon band low on the candle, far below the flame line.
Big Statement Bows & Ribbon Technique
29. The One-Bolt Rule: Buy Once, Tie Everywhere
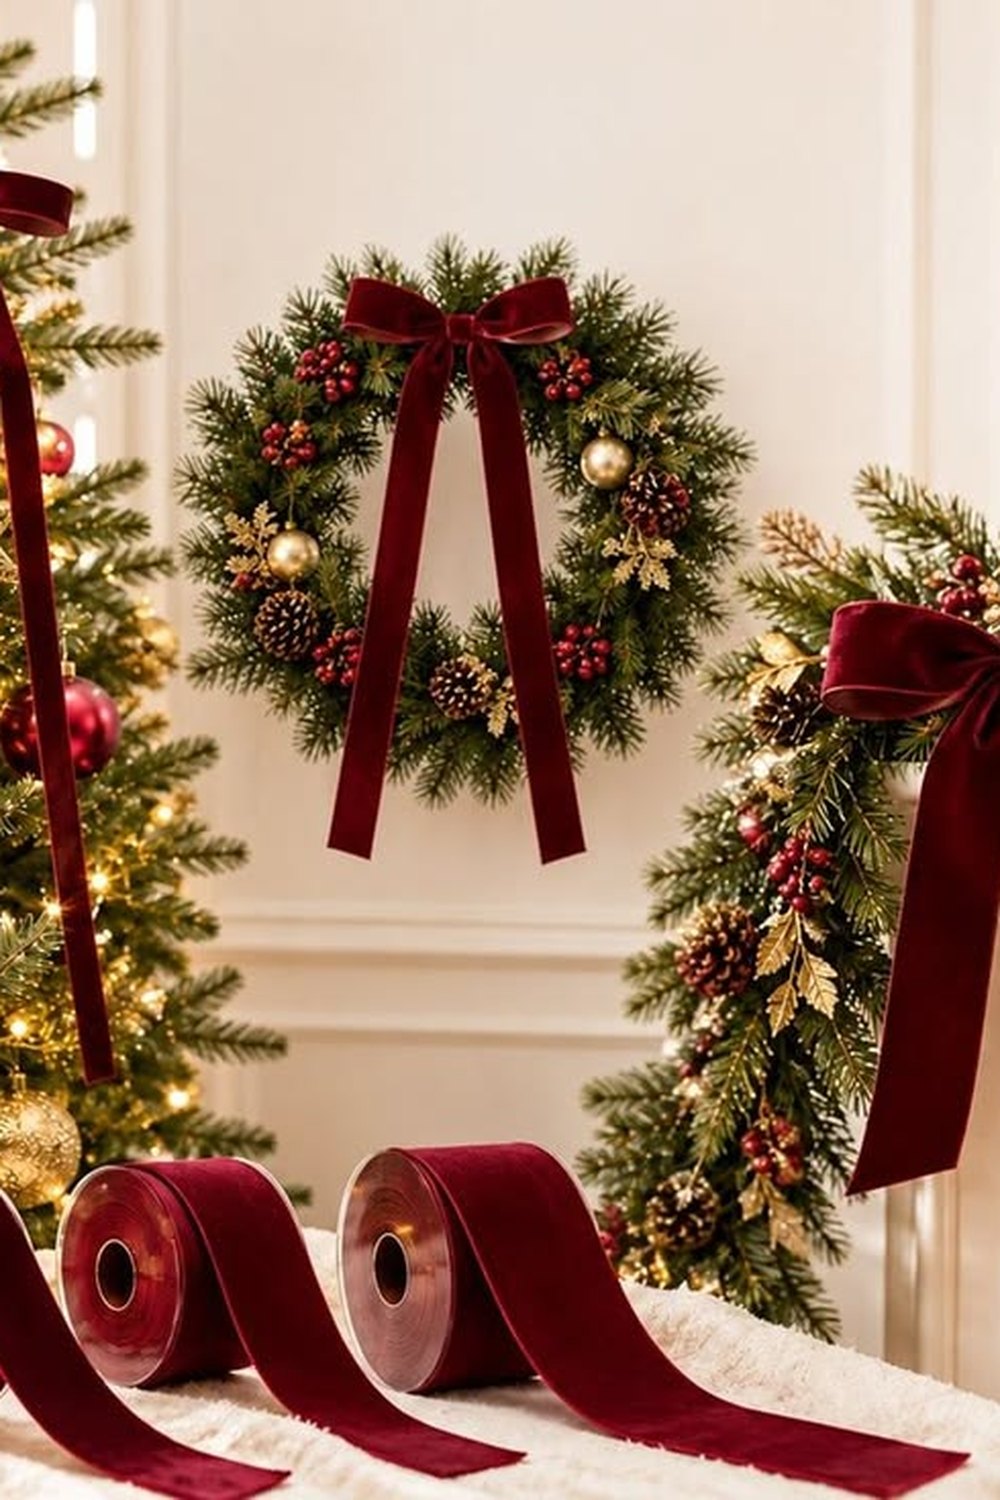
One bolt of ribbon repeated everywhere is the cheapest designer trick there is.
The secret behind every coordinated Christmas room is boringly simple: one long bolt of double-faced velvet ribbon in a single colour, repeated on the tree, the wreath, the garland, the table and the gift wrap. Because the ribbon matches everywhere, pieces bought in different years suddenly look like one designed set — at the cost of a single spool.
Styling tip: buy a 10-metre bolt of 5–6 cm wired velvet in burgundy, hunter or khaki and budget it roughly: 2 metres for the topper, about 40 cm per garland or tree bow, the rest for table and gifts. When in doubt, buy the second bolt — dye lots differ.
30. Choosing Ribbon That Behaves: Wide, Wired, Double-Faced
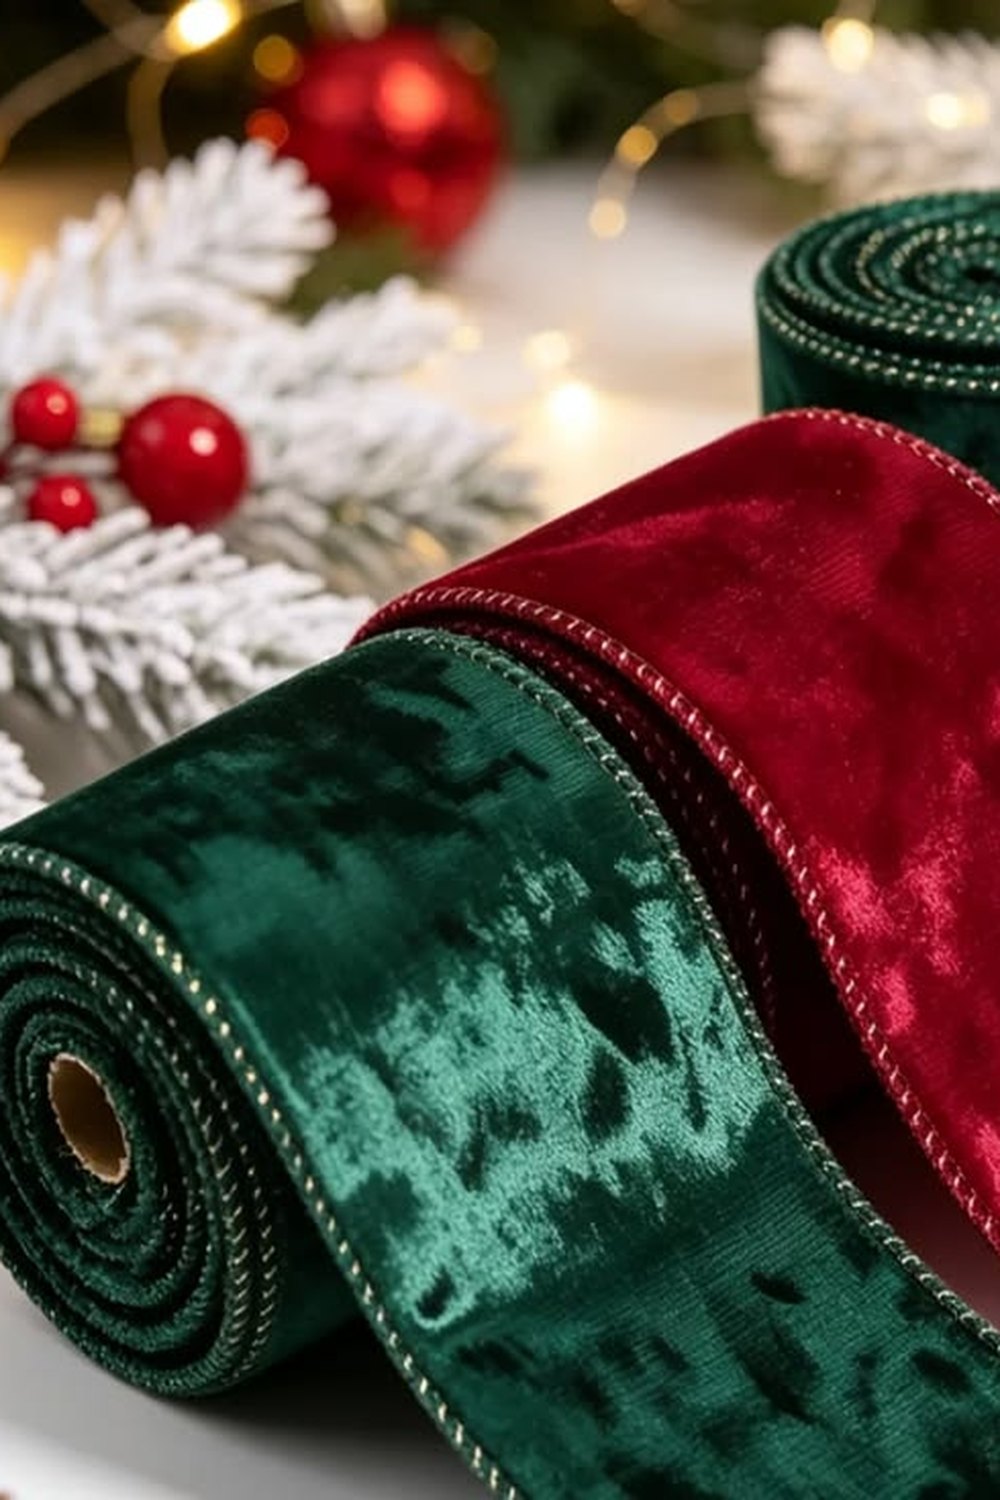
The right ribbon does half the work — wired edges are non-negotiable.
Every good bow in this guide starts with the same shopping list: wired edges that hold the loops open, velvet on both faces so the bow looks finished from behind, and enough width for the job. Flimsy unwired florist ribbon is the false economy of Christmas — it collapses within a week and takes the whole look down with it.
Styling tip: do the scrunch test in the shop — form a loop, squeeze it, and let go. If it springs back and holds, buy it; if it flops, leave it. Keep three widths at home: 10 cm for toppers and doors, 5–6 cm for tree and garland, 2.5 cm for napkins and glasses.
31. The Perfect Loop: How to Tie a Bow That Holds
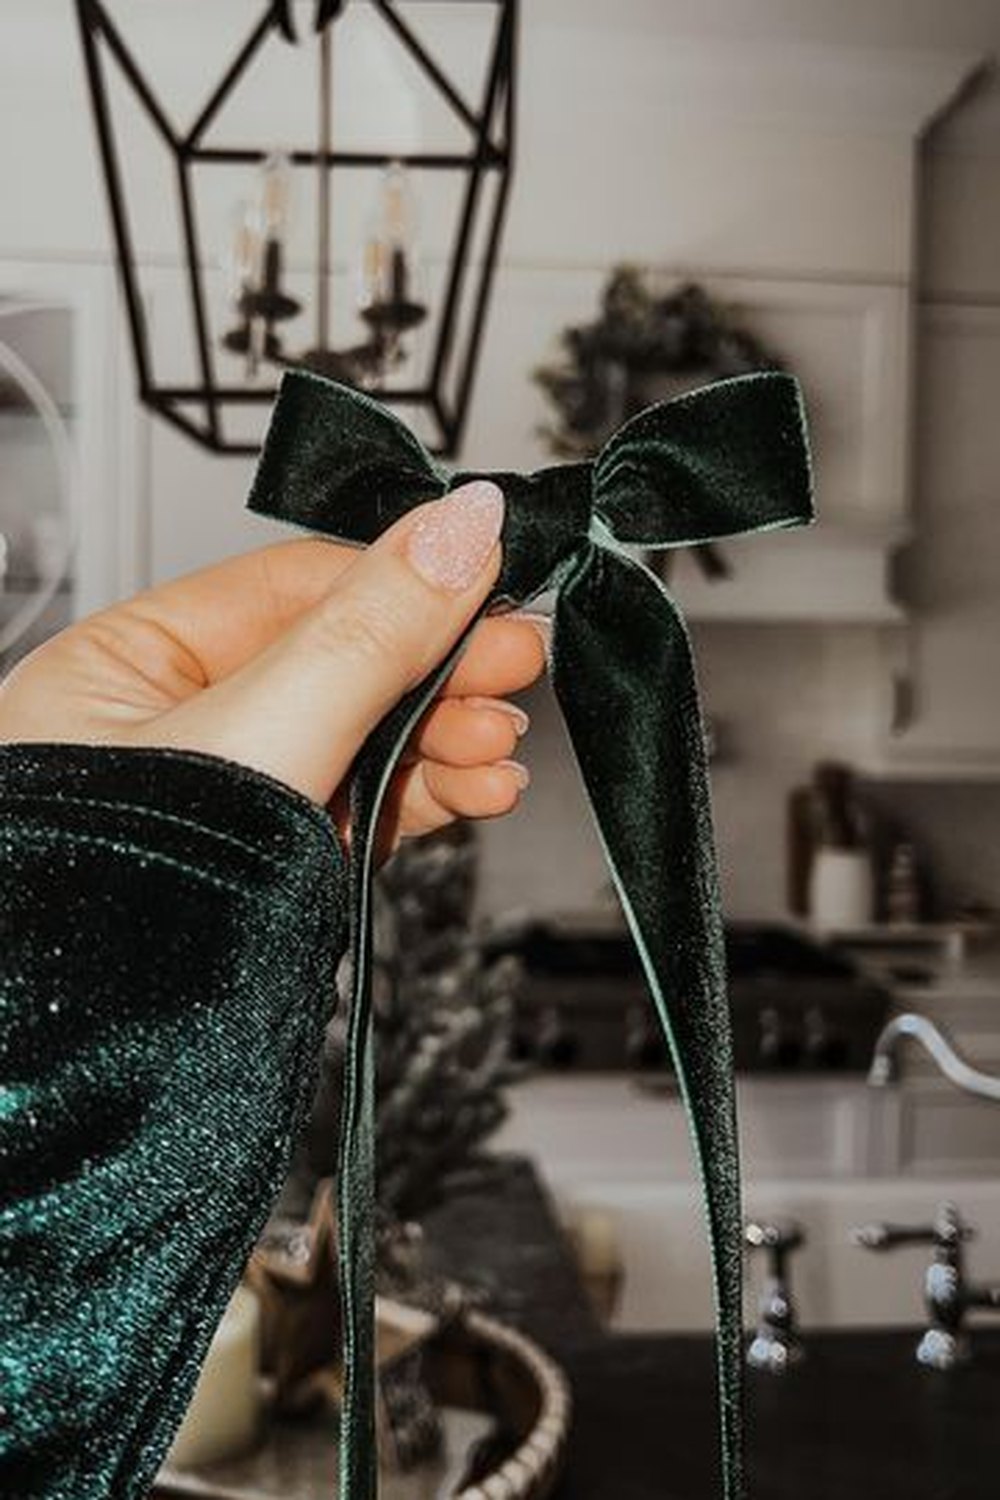
Pinch, wire, fluff — the three moves behind every good bow.
Forget tying bows in place on the tree. Work at a table: form two loops and a small centre loop, pinch the middle into tight accordion folds, wrap the pinch several times with thin floral wire and twist it hard. Then fluff — reach inside each loop and pull the inner edge outward until the bow stands round and full. Attach the finished bow anywhere using the same wire tails.
Styling tip: loop length should be roughly twice the ribbon's width — 5 cm ribbon wants 10–12 cm loops; 10 cm ribbon wants 20 cm-plus. Make the whole set in one sitting and your bows will match each other, which is half the effect.
32. Tails That Behave: Dovetails and Length Rules
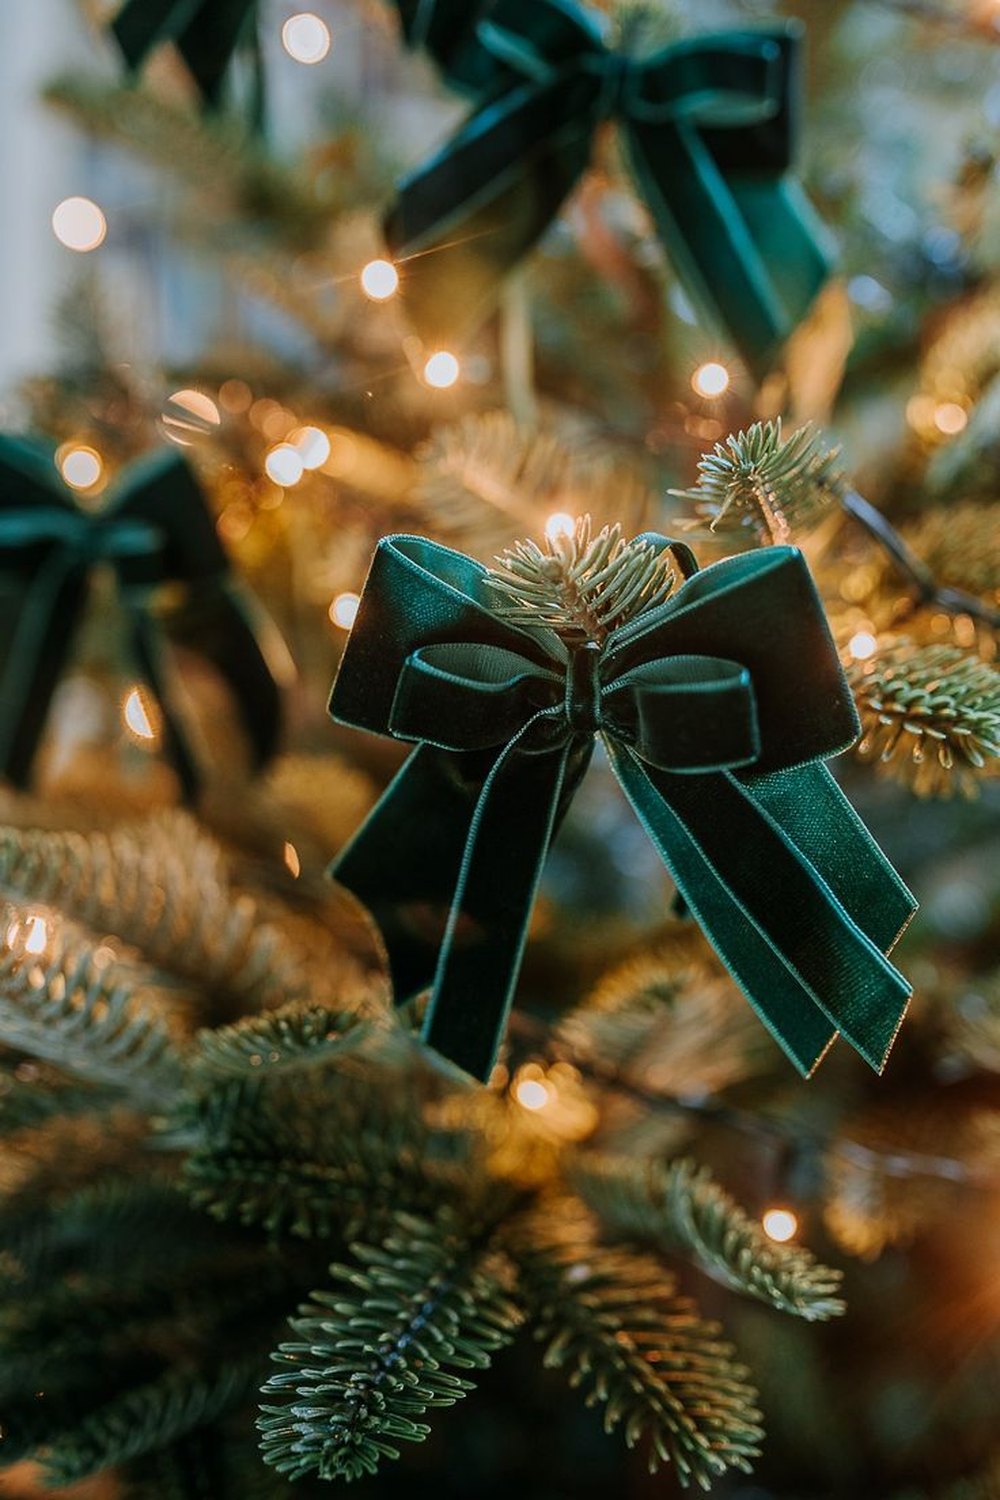
Clean-cut tails are the difference between homemade and high-end.
How a bow's tails end decides whether it looks crafted or costly. The two finishes that work are a sharp 45-degree diagonal and the dovetail V — fold the tail end in half lengthwise and cut diagonally across the fold, then open it to reveal a perfect notch. Ragged straight cuts and frayed edges undo an otherwise beautiful bow.
Styling tip: always cut tails last, after the bow is attached and hanging — gravity shows you the true angle and length. Match length to the job: long and flowing on toppers and wreaths, short and neat on napkins and candles. Use sharp fabric scissors, reserved for ribbon only.
33. The Door-Sized Bow: A Wreath-Free Front Door
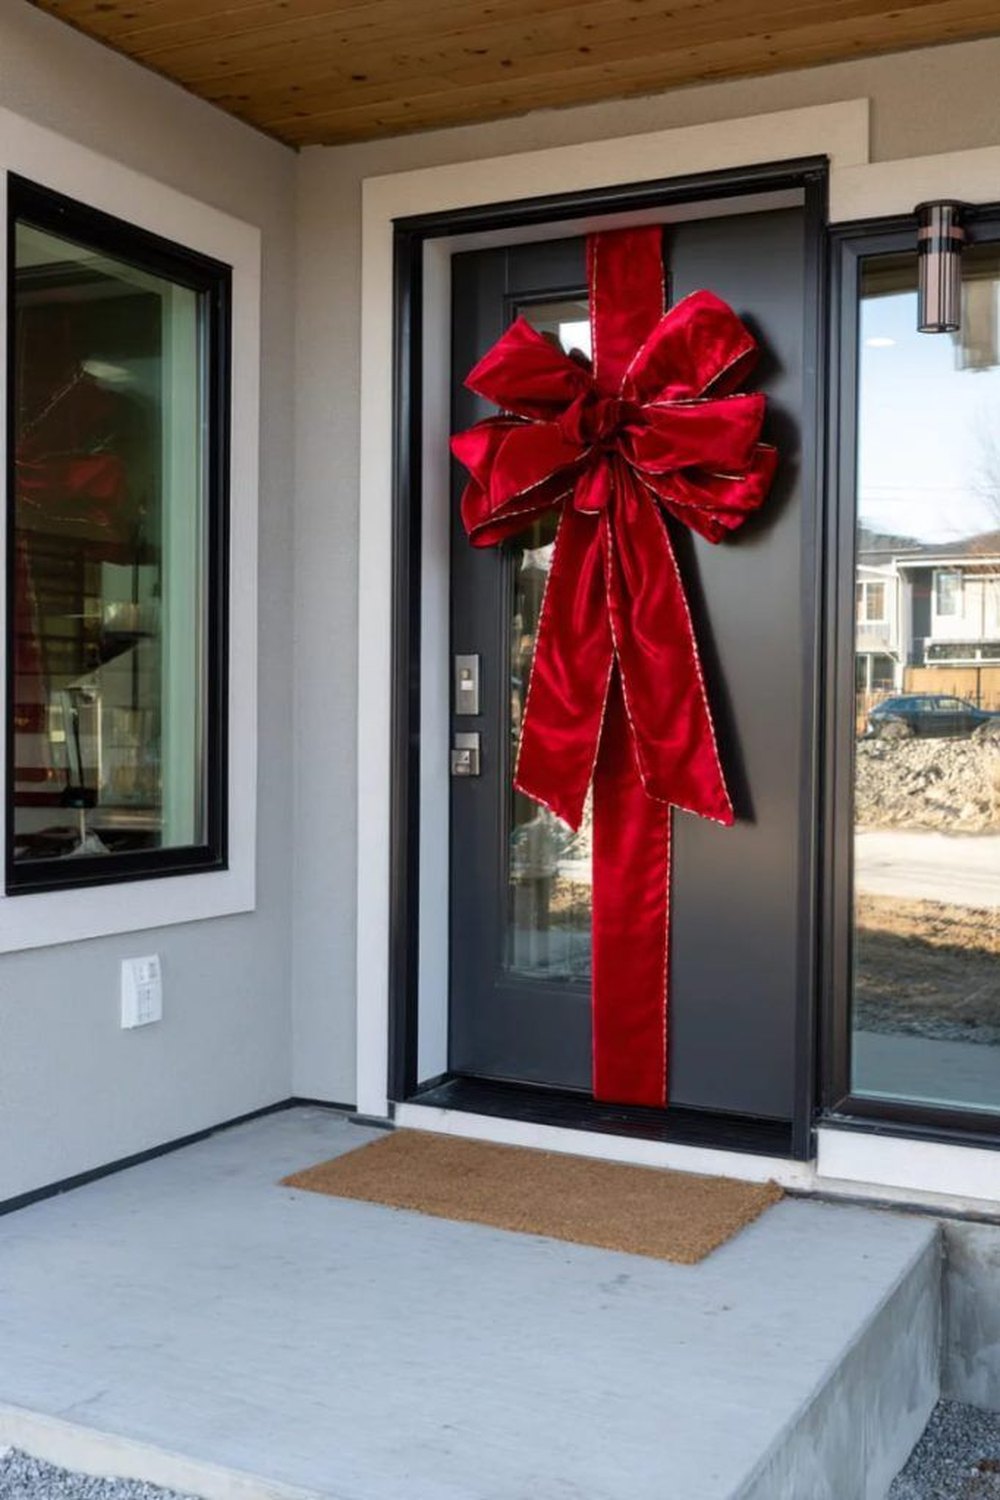
One giant bow on the front door — bold, simple and done in five minutes.
Skip the wreath entirely and hang a single oversized bow at the centre or upper third of the front door. It is the boldest of all christmas bow decor ideas and the fastest: one bow, one hook, and the door is dressed. Deep red or burgundy velvet against a painted door — especially dark green or black — looks strikingly smart.
Styling tip: build the bow big (loops of 30 cm or more) and layer two loops per side so it holds its shape at that scale; hang it from a wreath hanger so the door is unmarked. Under an exposed porch, choose weather-resistant velvet-look ribbon rather than true velvet.
34. Velvet Colour Stories: Burgundy, Hunter, Khaki and Olive
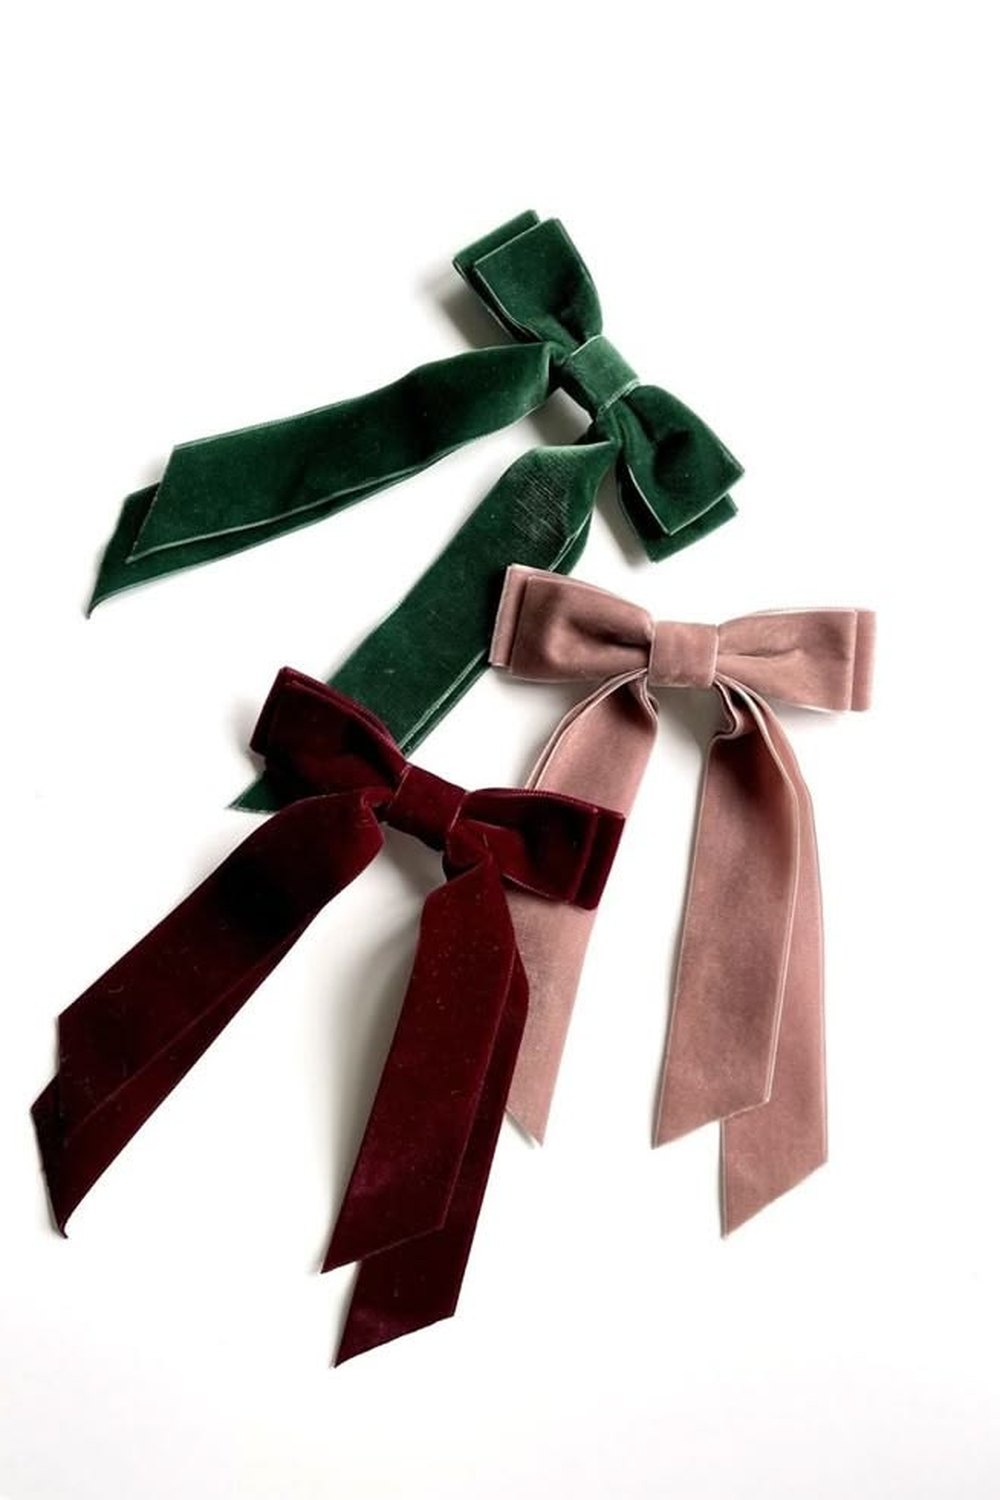
Muted, light-absorbing shades are the velvet colours of the year.
The creator-led velvet palette this season is deep and muted: burgundy, hunter green, khaki and olive lead, with plum and chocolate close behind. These shades absorb light rather than reflecting it, which is why they photograph so richly and sit so comfortably with greenery, brass and dark wood. Bright scarlet has its place in a classic scheme, but the expensive-looking rooms are wearing the deeper tones.
Styling tip: buy the ribbon before the baubles and match the ornaments to it, not the other way round — ribbon is the cheapest element in the room and the one that sets the palette. Burgundy flatters cream rooms, hunter loves tartan, khaki and olive keep neutral Scandinavian schemes festive without shouting.
35. Made to Last: Storing Bows and Reviving Velvet
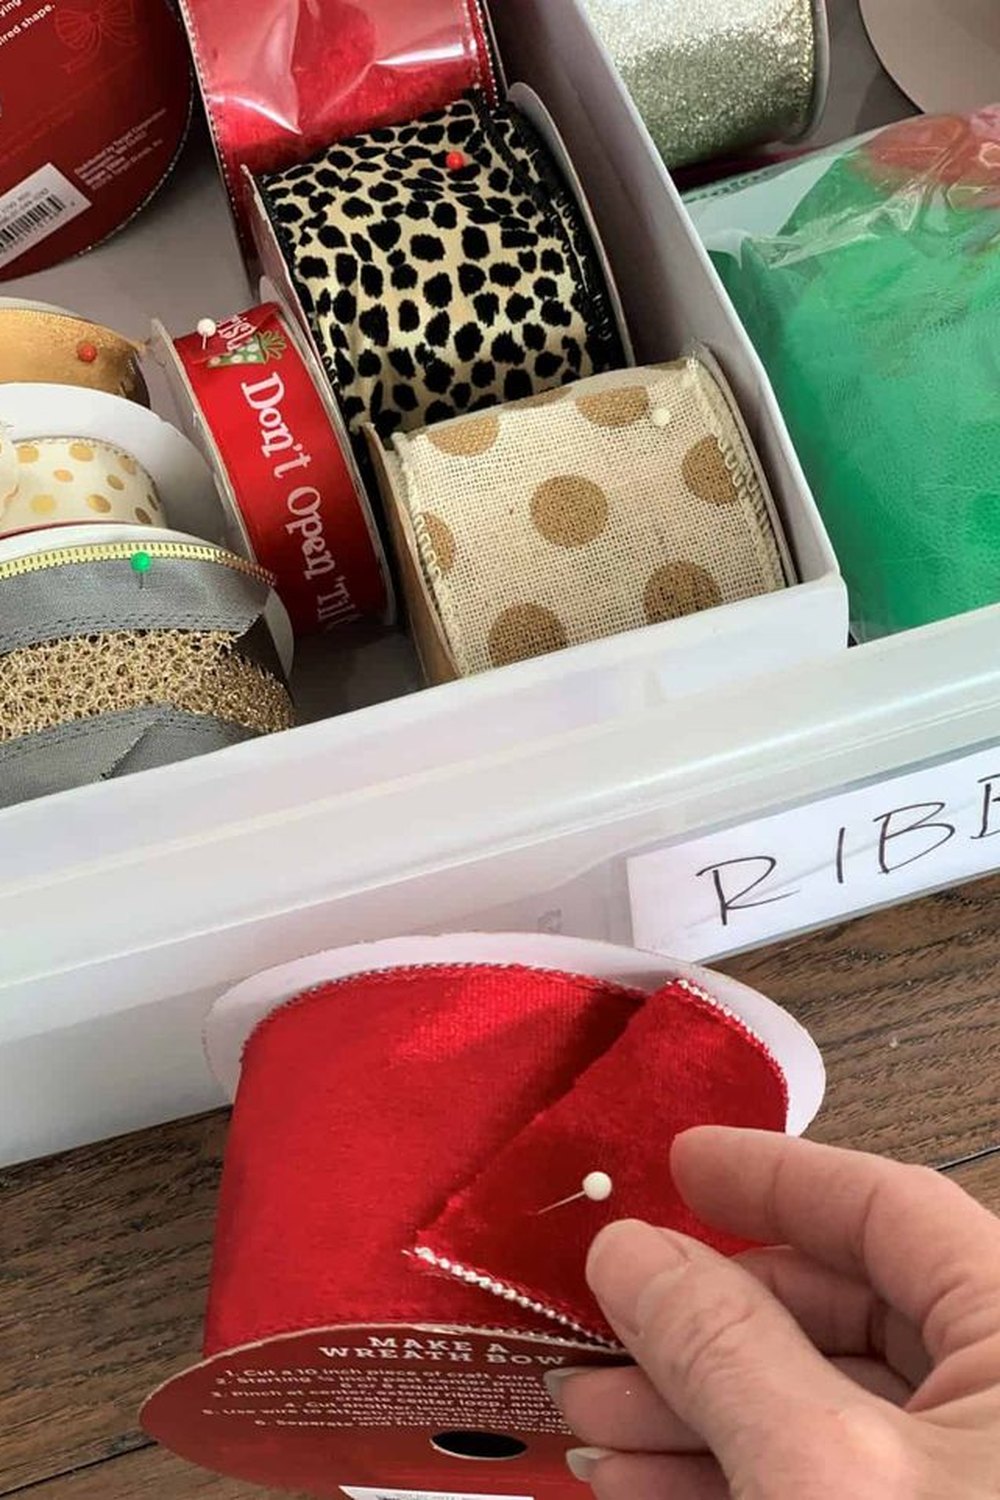
Ten minutes of packing in January saves an hour of re-tying next year.
Good wired bows are reusable for years if they are stored like the small structures they are. Stuff each loop gently with tissue so it keeps its round shape, lay bows flat in a box rather than crushed under decorations, and wind leftover ribbon back onto its roll or a card — never folded, which creases velvet permanently.
Styling tip: revive a flattened bow with a few seconds of gentle steam (a kettle's spout works) and a re-fluff of the loops. Photograph your tree and mantel before you pack them away, and next year's decorating becomes simple copy-and-paste.
Essential Decor Takeaways
- Wired, double-faced velvet is the ribbon that matters — every bow in this guide depends on edges that hold and velvet on both sides.
- One bolt, everywhere: repeat a single ribbon on the tree, wreath, garland, table and gifts for instant whole-room cohesion.
- Scale is the statement: topper and door bows should be bigger than feels safe indoors — distance shrinks them.
- Tie in proportion: loop length roughly twice the ribbon width, and cut tails last, at 45 degrees or in a dovetail V.
- Pinch, wire, fluff: make bows at a table in batches and wire them on — never wrestle ribbon into shape on the tree.
- Respect the flame: bows sit low on candlesticks and clear of lantern vents, or flameless candles take the risk away.
- Muted shades photograph best: burgundy, hunter, khaki and olive velvet read expensive in every light.
Frequently Asked Questions
What ribbon is best for christmas bow decor ideas?
Wired, double-faced velvet, every time. The wire holds the loops open, velvet on both faces means the bow looks finished from every angle (essential on mirrors and glass doors), and the matte pile photographs beautifully. Keep three widths: about 10 cm for toppers and front doors, 5–6 cm for tree, wreath and garland bows, and 2.5 cm for napkins, candlesticks and glasses. Avoid unwired florist ribbon — it collapses within days.
How many bows do I need to decorate a Christmas tree?
For the bows-as-the-main-event look on a standard 6-foot tree, plan on 8–12 large bows (loops 12–15 cm) spaced evenly, plus one oversized topper bow if you are replacing the star. Add a handful of mini bows for the gaps deep in the branches. A 10-metre bolt of 5–6 cm wired velvet covers the large bows comfortably; buy a second bolt if the same ribbon is dressing the wreath, garland and gifts as well.
Why do my bows go flat or droopy?
Almost always the ribbon: unwired or single-faced ribbon cannot hold a loop, and loops made too large for the ribbon's width collapse under their own weight. The fix is wired ribbon, a centre pinch wrapped tightly with floral wire, and loop lengths around twice the ribbon width. A bow that has only flattened in storage revives with gentle steam and a re-fluff — and storing loops stuffed with tissue prevents it happening again.
Can I reuse the same ribbon bows next Christmas?
Yes — that is the quiet economy of the whole bow trend. Wired velvet bows keep for years if they are stored with tissue in the loops, laid flat in a box, and kept dry. Leftover ribbon goes back on its roll, never folded. Steam out any creases, re-fluff the loops, and last year's topper, wreath bows and napkin ties come back looking new.
Start with one bolt of ribbon and one bow — the topper, the wreath, or a set of napkin ties — and you will feel how quickly the rest of the room asks to join in. Save your favourite christmas bow decor ideas from this list, tie a batch this weekend, and let the bows do the decorating. For more seasonal inspiration, follow TheStylingHub on Pinterest, where we pin fresh bow, tree, mantel and table ideas all season long.